
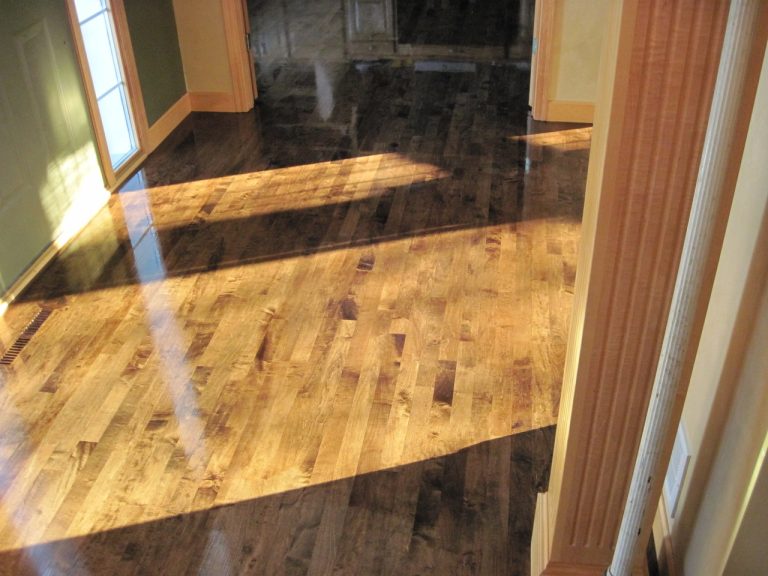
Waxed hardwood floors have long been prized for their timeless elegance and warm ambiance. However, as the years pass, these once-lustrous surfaces can lose their sheen due to an accumulation of wax and everyday wear. This guide aims to provide homeowners with a thorough understanding of the refinishing process, including how to remove old wax from hardwood floors, enabling them to breathe new life into their cherished hardwood floors.
The Benefits of Refinishing Waxed Hardwood Floors
Refinishing waxed hardwood floors offers several significant benefits that homeowners should consider:
- Aesthetic Rejuvenation: The removal of built-up wax unveils the wood’s inherent beauty, allowing its natural grain and color to shine through once more.
- Augmented Longevity: A fresh protective layer enhances the floor’s resilience against daily wear and tear, potentially extending its lifespan by years.
- Imperfection Remediation: Minor blemishes and scratches that have accumulated over time can be effectively addressed, resulting in a smooth, unblemished surface.
- Enhanced Indoor Air Quality: The elimination of trapped dust particles can lead to a marked improvement in air quality, particularly beneficial for those with respiratory sensitivities.
- Cost-Effective Renovation: When compared to the substantial expense of complete floor replacement, refinishing offers a more economical solution for revitalizing one’s living space.
Assessing the Floor Surface Before You Begin
Before embarking on the refinishing process, a thorough assessment of your floor surface is crucial. Here’s what to look for:
- Minor Scratches and Dents: Use a flashlight to identify any minor scratches or dents that may require attention. You can address these with wood filler and sanding.
- Deep Scratches and Gouges: Deep scratches and gouges require more extensive repairs. You may need to replace individual floorboards or seek professional help from a qualified floor refinisher.
- Unevenness: Check for any uneven areas on the floor. These may require sanding or leveling compound to ensure a smooth surface for the new finish.
The National Floor Covering Association (NFCA) recommends that hardwood floors typically last 25–30 years with proper care and refinishing every 3–5 years. Regularly assessing your floor surface and refinishing when needed can significantly extend the lifespan of your investment. By taking the time to assess the condition of your floors before you begin, you can ensure a successful refinishing project and avoid any unexpected surprises down the road.
Preparing the Room for Refinishing
Once you’ve assessed your floor surface, it’s time to prepare the room for refinishing. Here are the essential steps to follow:
| Step | Description |
|---|---|
| Remove Furniture and Decor | Completely clear the room of all furniture, rugs, curtains, and other items to create a clean workspace. |
| Thoroughly Clean the Floors | Vacuum or sweep the floor meticulously to remove dust, debris, and dirt before starting. |
| Open Windows and Use Fans | If using an oil-based finish, ensure proper ventilation by opening windows and using fans. |
| Cover Doorways and Vents | Use plastic sheeting or drop cloths to seal doorways and vents to keep dust from spreading. |
| Wear Protective Gear | Use gloves, goggles, and a dust mask to protect against chemicals, dust, and debris. |
Refinishing Waxed Hardwood Floors: The Step-by-Step Process
With the room prepped and ready, we can now move on to the core of the project: refinishing the waxed hardwood floors. Here’s a detailed breakdown of each step involved:
1. Sanding
Sanding is an essential step that removes the old wax finish and prepares the wood for the new finish. It’s recommended to start with a coarse-grit sandpaper and gradually progress to finer grits to achieve a smooth and even surface. Remember to wear protective gear while sanding to shield yourself from dust particles. This process is crucial when learning how to remove old wax from hardwood floors.
Tip: To maintain the effectiveness of the sandpaper, replace it regularly. A worn-out sheet can not only slow down the sanding process but also damage the floor’s surface. Consider renting a drum sander for larger areas; it can significantly save time and effort compared to manual sanding.
2. Edging and Detail Sanding
Since a larger floor sander can’t reach tight spaces and corners, you’ll need to use an edger sander or a hand-held detail sander for these areas. Meticulous edging and detail sanding are crucial, as they significantly impact the final look of your refinished floors.
3. How to Remove Old Wax from Hardwood Floors
Before applying any new finish, it’s essential to remove any old wax from hardwood floors to ensure proper adhesion of the new finish. To remove old wax, you can use a commercial wax remover or a homemade solution of vinegar and water. Apply the remover or solution to a small section of the floor and let it sit for a few minutes to soften the wax. Then, use a soft cloth or scrub brush to gently lift the wax. Be sure to work in small sections and change the cloth or brush frequently to avoid spreading the wax. Once all the wax is removed, thoroughly clean the floor with a damp mop to remove any residue and let it dry completely before proceeding with the new finish.
4. Applying the New Finish
Once the floor is prepped and ready, you can now apply your chosen finish, which can be stain or polyurethane:
- Stain (Optional): If you desire to alter the color of your wood floors, stain can be used for customization. Apply the stain evenly using a rag or applicator, following the manufacturer’s instructions for optimal results. Allow the stain to dry completely before proceeding to the next step.
- Polyurethane: Polyurethane acts as a clear protective finish that safeguards the wood while adding a beautiful shine. You can choose between water-based or oil-based polyurethane based on your preference and drying time requirements. Apply the polyurethane in thin, even coats using a roller or brush. Allow each coat to dry completely before applying the next. The number of coats needed will depend on your desired level of protection and the level of shine you want to achieve. Applying polyurethane in thin coats is crucial. Thick coats take longer to dry and can leave an uneven finish that detracts from the overall look of your floors.
Table: Water-based vs. Oil-based Polyurethane
| Feature | Water-based Polyurethane | Oil-based Polyurethane |
|---|---|---|
| Drying Time | Faster drying time (typically 2–3 hours per coat) | Slower drying time (typically 12–24 hours per coat) |
| Odor | Lower odor | Stronger odor |
| Cleanup | Easier cleanup with soap and water | Requires mineral spirits for cleanup |
| Durability | Slightly less durable | More durable |
5. Allowing the Floor to Dry
After applying the final coat of finish, it’s vital to allow the floor to dry completely according to the manufacturer’s instructions. Drying time can vary depending on the type of finish used. Avoid walking on the floor or placing furniture back on it until it’s fully cured.
6. Cleaning Up After Refinishing
With your floors dry and the new finish cured, it’s time to clean up and enjoy the fruits of your labor!
- Vacuum Cleaning: Thoroughly vacuum the entire floor to remove any dust or debris left behind from the refinishing process. Use a soft-bristled brush attachment to avoid scratching the newly finished surface.
- Damp Mopping: Use a damp mop or cloth to remove any residual dust or debris that the vacuum might have missed. Be mindful not to use excessive water, as this can damage the new finish. Allow the floor to dry completely before walking on it.
Additional Tips for Refinishing Waxed Hardwood Floors
While refinishing waxed hardwood floors can be a gratifying endeavor, it necessitates meticulous planning and execution. Consider the following recommendations to ensure optimal results:
- Professional Consultation: For those lacking confidence in their DIY abilities, engaging a professional floor refinisher may be advisable.
- Preliminary Testing: Conduct a small-scale test in an inconspicuous area to confirm satisfaction with the chosen finish before full application.
- Ongoing Maintenance: Implement a regular care regimen to preserve the newly refinished floor’s appearance and integrity.
- Environmental Factors: Be mindful of temperature and humidity levels during the refinishing process, as these can impact drying times and finish quality.
- Quality Materials: Invest in premium products and tools to achieve superior results and potentially extend the time between future refinishing needs.
Final Thoughts
The process of refinishing waxed hardwood floors, while demanding in terms of time and attention to detail, offers a rewarding opportunity to restore the natural beauty of one’s home. Understanding how to remove old wax from hardwood floors is crucial to achieving the best results. By adhering to these guidelines and exercising patience throughout the process, homeowners can successfully revitalize their hardwood floors, creating a stunning focal point that will endure for years to come.