
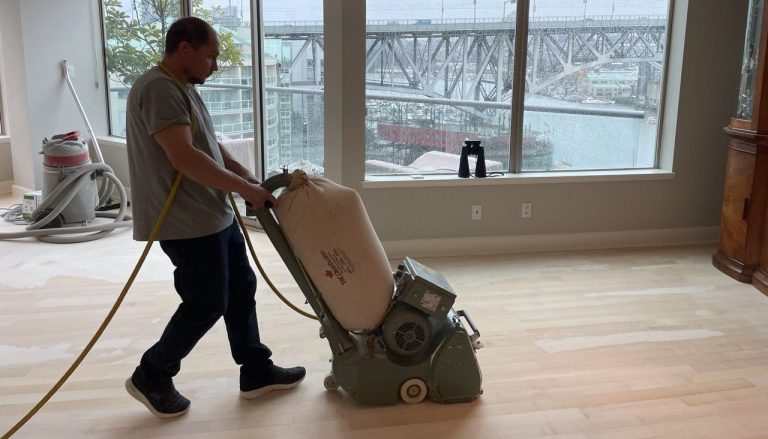
Hardwood floors carry their stories in every step – the creaks, the dull patches, that one board that catches the light differently than the rest. Over the years, life leaves its mark, and sanding is how we start rewriting those stories. At 1 DAY® Refinishing, our crews know that hum of a drum sander when it’s tuned just right – that low, steady buzz that tells you the grit’s biting clean. It’s not about fancy tools; it’s about rhythm, patience, and the kind of skill that only comes from doing this work day after day.
Before any machine starts, we inspect and prep. Furniture moves out, vents get sealed, airflow’s balanced, and lights drop low so every scratch shows before the first pass. Using drum, edge, and orbital sanders with HEPA vacuums, our crews move through a four-stage grit sequence, blending edges and corners until the floor feels seamless. A full sanding cycle takes about a day per room – maybe two if the boards are uneven – and we clean between every pass to keep the air clear and the wood breathing right.
This quick overview is just the start. What follows is the full walk-through – the process we’ve refined over years, the one that turns long workdays into floors that look new again by the time morning light hits them.
Inspecting the Floor
Before any machine rolls in, we spend time reading the floor. Every board has history. First thing – we check the wear layer. Older hardwoods can be paper-thin, and one heavy pass can take them out for good. We set every nail head down flush; one proud nail can tear a sanding belt in seconds.
Different woods, different behavior. Maple’s tough and slow, oak’s smooth, and pine… well, pine dents if you breathe wrong. If we see cupping or uneven spots, that usually points to moisture or movement underneath. Happens a lot after wet seasons. We’ve got a full piece on how to draw moisture out of wood floors if you want to see how we deal with that.
We run a hand across the grain – feeling for wax, ripples, or grit. A quick water drop tells the rest: if it beads, there’s old finish to remove. If it soaks in, that surface is ready. That tiny check saves hours later.
Clearing & Protecting the Space
Prep’s the unsung hero. Miss one vent or skip a doorway and, trust me, dust will find its way into every corner of the house. At 1 DAY® Refinishing, we strip the room to its bones — furniture, curtains, vents, all of it. The space has to feel bare before the machines start humming. Then we seal everything tight with plastic and tape so the rest of the house stays clean and the client doesn’t spend a week chasing dust.
Lighting’s another little secret. We drop lights low to the floor; raking light tells the truth about every ridge or mark that overhead lighting hides. Airflow’s its own balancing act — one cracked window, one fan drawing outward, never a crosswind. Keeps the air breathable but calm. It’s routine now, but still satisfying when a client says, “Can’t believe how clean you left it.” We hear that one a lot — and we like hearing it.
Tools & Gear – What We Bring to the Job
Each floor gets the same lineup of machines and safety gear. Nothing fancy – just reliable equipment we maintain ourselves.
| Equipment | Purpose | Typical Usage Time |
|---|---|---|
| Drum Sander | Main machine for open floor sections | ≈ 70 % |
| Edge Sander | Works along walls and tight corners | ≈ 20 % |
| Orbital / Buffer | Final blending and screening | ≈ 10 % |
| Shop Vacuum | Collects dust between passes | All stages |
| Extension Cords | Keeps power safe and steady | Setup |
| Respirator Mask | Filters fine wood dust | Always |
| Hearing Protection | 90–100 dB equipment | Always |
| Knee Pads / Gloves | Comfort and grip | As needed |
We always test every sander on scrap before starting. A misaligned drum leaves chatter marks that no finish can hide. That kind of detail – we never skip it.
Choosing the Right Sandpaper Grits
Getting the grit sequence right is where experience really shows. We pick it based on the floor’s age, coating, and hardness.
| Stage | Grit Range | Purpose |
|---|---|---|
| First Cut | 36–40 | Removes finish, flattens boards |
| Second Cut | 50–60 | Smooths first-pass marks |
| Third Cut | 80 | Refines texture for sealing |
| Final Screen | 100–120 | Evens tone before coating |
For dense species like maple, we’ll slot an extra grit step in. Softer woods skip one. When belts heat up and the air smells faintly like resin – that’s dull paper. We swap it right away. Burning wood wastes time and ruins edges. Our refinishers change paper fast, sand slow – that’s the formula.
Keeping Dust Under Control
Wood dust doesn’t ask for permission – it travels. So before we start, our crew locks down the space tight. According to a 2017 study published by PMC (PubMed Central), sanding creates fine dust that can stay in the air for hours – which is why every sander we run connects to a HEPA vacuum rated for 99% filtration. The dust bags get emptied midway through each pass. You can hear when they fill – airflow shifts and the tone goes flat. We catch that before it happens.
A small fan exhausts the air outside. That steady outward pull keeps the workspace clean and keeps clients’ homes from filling with dust.
The First Pass – Heavy Sanding and Leveling
This first cut sets the tone. The drum lowers while we walk forward – never while standing still. You can feel it the instant the grit starts biting: a firm pull, a low growl, that faint smell of stripped finish. We go with the grain, overlapping by a third. Uneven floors get a diagonal first pass to level them out, then a straight one to clean the pattern.
The goal here isn’t speed – it’s consistency. The surface should feel even, not polished. Push too hard or stay too long in one spot, and you’ll end up with over sanded wood – thin spots that no finish can hide. That’s how you know you’ve taken off the right amount. The rest is finesse.
Edging and Corners – The Finishing Reach
Edging’s the part where patience wins. We start with the same grit we used on the field: 36, 60, then 80. The edge sander stays flat and steady – one tilt, and you’ll leave a ring that flashes under finish.
Our crew at 1 DAY® Refinishing works clockwise, blending those perimeter zones into the main field with a random orbital sander. That subtle transition – called feathering – makes the difference between a floor that looks “done” and one that looks perfect.
Clients don’t always see the work that goes into it, but they notice the result when the morning light hits every board just right.
Intermediate Sanding – Refining the Surface
Now the floor’s clear wood, ready for finesse. Between every grit, we vacuum – no exceptions. Even one stray grain from 40 grit can carve a swirl through 80.
You can hear when the paper dulls – the hum softens, and the dust gets heavier. That’s our cue to change. Under raking light, we check every pass. You learn to trust both your ears and your eyes. Each grit makes the floor smoother, but the goal stays the same – level, clean, no cross-scratches. Every pass builds toward that glass-smooth feel.
Final Sanding & Screening
This last step is where the floor turns silky. We run a 100–120 grit screen on an orbital or buffer, letting its weight glide. No pressure – just patience. You hear a faint hiss when it’s right, like soft sand under your boots. We move in wide overlaps to blend every section. Then we vacuum, wipe down with a tack cloth, and inspect under low light.
At that moment, the surface feels cool and smooth to the touch – ready for finishing. That’s usually our pause point – a short break before moving into hardwood floor refinishing. Coffee tastes better when the boards look this clean.
Safety, Comfort & Air Quality
We work clean and safe, every time. Dust might look harmless, but it isn’t. Every crew member wears a respirator with a real filter, plus goggles and ear protection. According to the NWFA Sand & Finish Guidelines, the ideal range for sanding and finishing stability sits around 35–55 % RH and 18–24 °C, and that’s exactly where we keep our rooms for smooth, consistent results.
Knee pads, gloves, hydration – all part of the day. After years of doing this, we’ve learned comfort is safety. No shortcuts, no skipped gear – that’s how we keep crews healthy and jobs consistent.
Cleanup & Final Prep
Once sanding’s done, we treat cleanup as part of the craft. Every wall, vent, and corner gets vacuumed twice. Then we go over the floor with tack cloths to pull the last trace of dust.
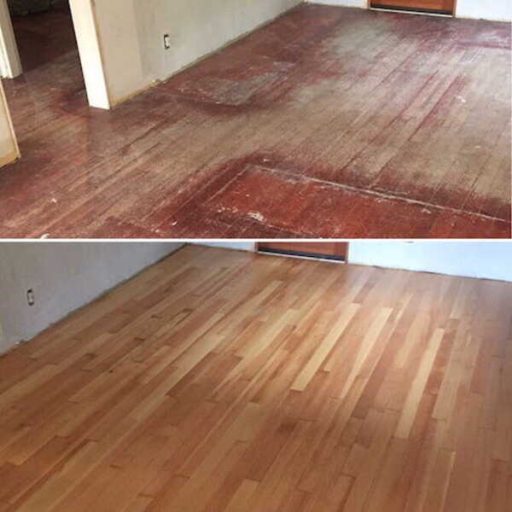
We patch nail holes or cracks using color-matched filler, hand-sand the spots flat, and do one last inspection under angled light. No swirl marks, no chatter – only smooth grain. When everything passes, we prep for finishing. That’s the moment clients start smiling – they can already see the transformation.
And if a homeowner ever started a job and called us halfway through, we finish it without judgment. Happens more often than you’d think.
Wrapping It Up the Right Way
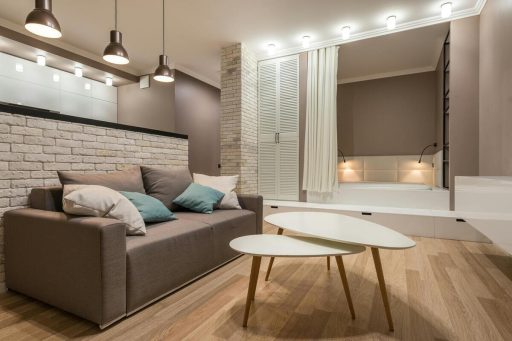
Sanding floors isn’t glamorous, but it’s honest work. You hear the machines hum, smell the wood dust, see the grain return – that’s the reward. Every time we finish a job, there’s that second when sunlight hits the floor and it looks alive again. Smooth, clean, quiet underfoot. That’s when we know it’s right. So yeah – good floors aren’t rushed, they’re revealed. And if you’d rather skip the noise and the learning curve, that’s fine. Our pros at 1 DAY® Refinishing handle the full process start to finish – dust-free, clean, and steady.
Ready to see what your floors can look like? Contact us for a no-pressure quote – our crews handle everything from sanding to the final finish.