Hardwood floors carry their stories in every step – the creaks, the dull patches, that one board that catches the light differently than the rest. Over the years, life leaves its mark, and sanding is how we start rewriting those stories. At 1 DAY® Refinishing, our crews know that hum of a drum sander when it’s tuned just right – that low, steady buzz that tells you the grit’s biting clean. It’s not about fancy tools; it’s about rhythm, patience, and the kind of skill that only comes from doing this work day after day.
Before any machine starts, we inspect and prep. Furniture moves out, vents get sealed, airflow’s balanced, and lights drop low so every scratch shows before the first pass. Using drum, edge, and orbital sanders with HEPA vacuums, our crews move through a four-stage grit sequence, blending edges and corners until the floor feels seamless. A full sanding cycle takes about a day per room – maybe two if the boards are uneven – and we clean between every pass to keep the air clear and the wood breathing right.
This quick overview is just the start. What follows is the full walk-through – the process we’ve refined over years, the one that turns long workdays into floors that look new again by the time morning light hits them.
Inspecting the Floor
Before any machine rolls in, we spend time reading the floor. Every board has history. First thing – we check the wear layer. Older hardwoods can be paper-thin, and one heavy pass can take them out for good. We set every nail head down flush; one proud nail can tear a sanding belt in seconds.
Different woods, different behavior. Maple’s tough and slow, oak’s smooth, and pine... well, pine dents if you breathe wrong. If we see cupping or uneven spots, that usually points to moisture or movement underneath. Happens a lot after wet seasons. We’ve got a full piece on how to draw moisture out of wood floors if you want to see how we deal with that.
We run a hand across the grain – feeling for wax, ripples, or grit. A quick water drop tells the rest: if it beads, there’s old finish to remove. If it soaks in, that surface is ready. That tiny check saves hours later.
Tools and Materials You’ll Need
We never start a repair until everything’s staged. Once filler starts curing, you can’t stop mid-fix to find a knife.
| Category | Examples | Purpose |
|---|---|---|
| Fillers | Wood filler, epoxy filler | Core materials for patching |
| Application Tools | Putty knife, plastic spreader, mixing stick | Press and level filler |
| Sanding Tools | Sandpaper (120–220 grit), orbital sander | Smooth and blend repairs |
| Cleaning Gear | Vacuum, tack cloth, microfiber cloth | Remove dust and residue |
| Safety Items | Gloves, respirator, eyewear | Protection from dust & fumes |
| Finishing Tools | Stain brush, stain pen, painter’s tape | Apply stain or finish coat |
Our refinishers always prep the surface with a vacuum and tack cloth. Even a trace of fine dust can block adhesion, so cleaning isn’t optional – it’s part of our repair rhythm.
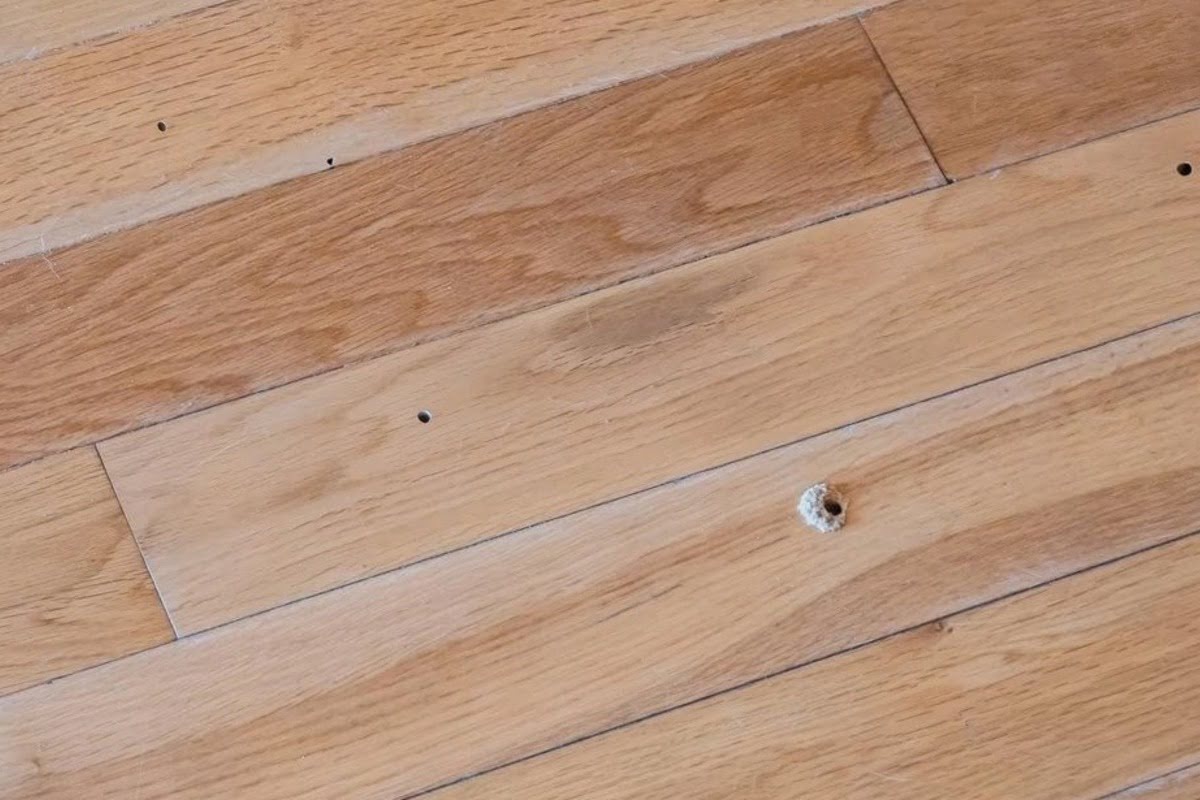
Assessing the Damage – Small vs Large Holes
Assessment drives the whole fix. We start by checking size, depth, and firmness around the damaged area – a repair only holds if the base wood does.
- Small (< ¼ in.) – these are your surface marks: nail pulls, pet claws, screw holes. They rarely reach the core, so a quick pass with fine-grain wood filler and light sanding usually does the trick. Still, matching the color matters – a poor tone match stands out more than the hole ever did.
- Medium (¼–½ in.) – dents or cracks that sit just deep enough to catch dirt or moisture. Here we use thicker filler or a two-layer approach, pressing the first coat in tight with a putty knife before topping it once it firms up. A flexible filler works best – it moves a bit with seasonal expansion.
- Large (> ½ in.) – gaps, missing chunks, or rot that weaken the board itself. These need structure, not just filler. We mix epoxy or cut in a new patch piece so the surface can handle weight again. When epoxy warms slightly in your hands, you know the bond is live – that’s our cue to spread and shape it.
We always probe the edges for softness. If the knife sinks or the wood feels spongy, that’s punky wood – decayed, weakened fibers that can’t hold a patch. In that case, it’s time for a full board replacement, not a quick filler repair.
Preparing the Area
Prep defines the quality of the repair – and we treat it like a foundation. Nothing bonds to dirt or wax. Our crew vacuums every groove, wipes with a damp cloth, then runs a hand across the grain. When it feels clean and slightly cool, we know it’s ready.
Moisture levels matter. Anything above 12 % means pause the job and dry it down. We use the same airflow and heat control methods described in our guide on drawing moisture out of wood floors – steady air, gentle heat, patience. A quick pass with a heat gun helps when deep cavities need drying, but we never scorch.
Once the area’s ready, we mask edges with painter’s tape to keep finish lines sharp. It’s like setting the stage before the actors arrive.
Choosing and Applying the Right Filler
The product has to match the problem – and after years on job sites, we’ve tried just about all of them. For small nail holes or surface scratches, we often reach for Timbermate® wood filler – spreads smooth, dries fast, and you can re-wet it if needed. It sands clean and tints easily, perfect for dustless refinishing work.
When the job calls for full-trowel coverage before the final sanding, Bona® Pacific Filler is our go-to. It glides across the surface, stays flexible, and accepts stain evenly – pairs great with water-based finishes like Bona Traffic HD.

For deeper structural gaps or cracks that need real strength, Bona DriFast® Epoxy Filler or DuraSeal® Patch & Fill get the call. They’re tougher to sand but bond tight and cure rock-solid. And when we’re restoring large, open floors, Woodwise® Full-Trowel Filler helps close seams fast and blends beautifully across mixed grain patterns.
Each product has its rhythm – water-based fillers dry quick, epoxies build muscle, and oil-based putties still shine on vintage floors. The trick is matching chemistry to the condition of the wood. That’s what separates a fix that disappears from one that stands out under morning light.
| Filler Type | Best For | Durability | Sanding Ease | Color Options |
|---|---|---|---|---|
| Water-based filler (e.g., Bona® Pacific, Timbermate®) | Small-to-medium holes | Medium | Easy | Broad tone range |
| Latex / full-trowel filler (e.g., Woodwise®) | Large surface seams | High | Medium | Matches most species |
| Oil-based putty (e.g., DuraSeal® Putty) | Shallow imperfections | Low | Easy | Matches finished floors |
| Epoxy filler (e.g., Bona DriFast® Epoxy) | Deep voids and cracks | High | Harder | Tintable |
| Wax filler stick | Hairline marks | Low | No sanding required | Excellent blend |
When we’re working a big repair, the mix smells faintly like resin and feels warm in the hand – that’s how you know it’s curing right. You press it in, let it set, and sand until your fingertips can’t find the flaw. That’s the moment when the floor feels whole again.
Fixing Small and Big Holes – Step by Step
Every fix follows the same rhythm – clean base, solid repair, smooth finish – but the scale changes how we work.
Small Holes
We aim for finesse over force. Once the base is clean and dry, we press filler at a 45-degree angle so it grabs the grain. Slightly overfill – it’ll settle as it cures. Most small fixes dry in 30 to 60 minutes, but we always give them a bit longer before sanding; rushing is how you end up redoing it. When it’s ready, we sand with 180–220 grit, moving gently with the grain until the surface feels even. You can feel it change under your fingertips – that smooth, cool shift when the wood feels whole again. A quick wipe with a tack cloth finishes it off, ready for staining hardwood floors or sealing.
Big Holes
Deep voids take structure – and time. Strength comes from layering and patience. We mix epoxy until it warms slightly in our hands – that’s how we know the bond is live. We fill the cavity halfway, let it firm for a few hours, then add a second layer flush with the surface. While it’s still pliable, we level it with a spreader so sanding goes easier later. Full cure usually takes about 24 hours, depending on temperature and humidity.
Once cured, we feather-sand edges with an orbital sander until the patch feels dense and solid under the palm – quiet, no flex, no give. We often tint epoxy before applying – makes blending seamless later, especially on open-grain oak.

Sanding, Blending & Finishing
Sanding too soon tears the patch wide open; wait too long, and it’s like grinding stone. Timing’s everything. We usually start around 120 grit to knock the surface level, then move to 180 or 220 grit for finishing—always with the grain. You can hear the difference when it’s right: the rasp turns into a soft hiss, and the floor almost hums under the sander.
Once the filler feels firm—usually four to six hours for water-based or up to twenty-four for epoxy—we wipe everything down with a tack cloth until the surface feels chalk-smooth. Fine dust may look harmless, but it lingers in the air and can ruin a coat fast. According to the EPA Indoor Air Quality Design Tools for Schools , keeping airborne particles under control during renovation cuts exposure risks dramatically. That’s why our crews always vacuum between grits and tack before any finish hits the wood.
Then comes the seal. We match whatever system’s already on the floor—Bona Traffic HD, Loba 2K Supra, or Minwax Super Fast-Drying Poly if it’s an oil-based setup. Water-based dries fast and clear; oil gives that warm amber glow; hardwax oil leaves a natural feel underfoot. Each has its rhythm—some need a light screen between coats, others just a clean wipe and re-coat window.
| Filler Type | Touch-Dry | Full Cure |
|---|---|---|
| Water-based filler | 30–60 min | 4–6 hr |
| Epoxy filler | 2–4 hr | 24–48 hr |
| Oil-based putty | 15–30 min | 2–3 hr |
| Floor patch compound | ≈ 1 hr | 8–12 hr |
Cool basements can double those numbers; warm, ventilated rooms cut them in half. Different species take stain their own way—oak deepens quick, maple hardly shifts—so we always test before committing to a final coat. When that sheen levels out and the boards reflect clean light end-to-end, that’s the moment we know the repair’s invisible.

Common Mistakes and Pro Practices
After years in the trade, we’ve seen plenty of DIY fixes go sideways – one small miss with filler or timing, and suddenly the whole board needs replacing.
That’s why our crews at 1 DAY® Refinishing follow a tighter process from start to finish. Here’s the checklist our team works by – the small things that keep repairs clean, tight, and built to last:
- Clean first, always. Even a speck of dust kills adhesion faster than bad filler — that’s why we follow the same dust-control steps used when sanding hardwood floors.
- Overfill slightly. Every filler shrinks as it cures – better to shave it down smooth than chase a dip later.
- Let it cure fully. Surface-dry doesn’t mean bonded. We always give the mix the time it needs – a few extra hours if the room’s cool or damp.
- Stay flexible. Floors move with humidity, so we choose fillers that flex with the boards instead of cracking against them.
- Check color in daylight. Shop lights lie; morning light never does. That’s how we make sure the tone blends evenly across every board.
Before sealing, our refinishers inspect each patch under angled light – that last look catches uneven blending before the topcoat ever goes down. Some of our in-house habits keep the rhythm steady job after job:
- Work smaller sections – easier control, faster cleanup.
- Keep airflow steady – better curing, cleaner finish.
- Match color before mixing tinted epoxy – you can’t fix shade once it sets.
- Reseal every patch – protection isn’t optional; it’s part of the repair.
When wear spreads wide or filler covers large areas, we often recommend a full hardwood floor refinishing – same prep, same care, just scaled up. It’s the surest way to bring the floor back to one even, continuous tone.
Conclusion
Fixing holes isn’t an afterthought – it’s part of the craft. Small ones require skill; big ones take patience. Our team treats every repair as part of the floor’s strength, not just a patch. When the surface feels glassy under your hand and the grain catches the light again, that’s the moment we know it’s right – strong, quiet, and built to last.
If you’d rather skip the guesswork, our crews handle everything – clean, dust-free, and steady. Reach out to 1 DAY® Refinishing for a no-pressure quote and see how we can bring your hardwood floors back to life.