
Is refinishing hardwood floors worth it? Short answer: yes, when the floor is structurally sound and the damage is mostly at the surface. No, when you are trying to solve deeper problems with sanding alone.
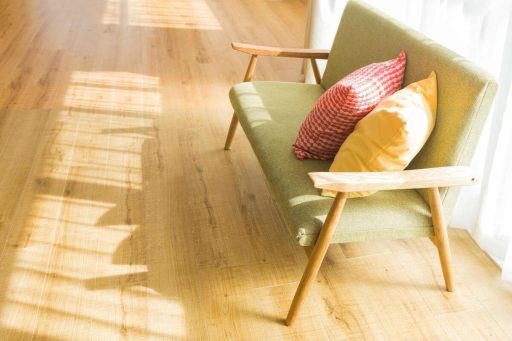
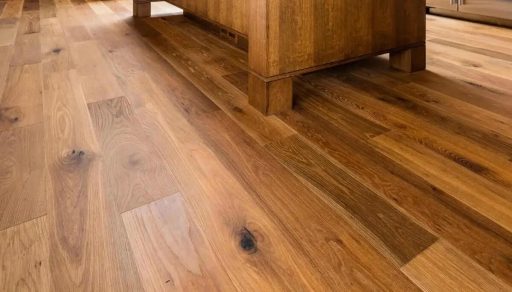
Most homeowners start here because the floor looks worn, but not finished. The boards feel solid. Nothing is loose. No obvious movement. The finish, though, looks dull, scratched, uneven, and worn through in traffic areas. That is usually the window where refinishing actually makes sense. Hardwood floor refinishing resets the surface of the floor. It removes the failed finish, corrects surface-level damage, restores color and sheen, and rebuilds protection. When conditions are right, floors that look tired or lifeless can come back clean and sharp without replacing material.
From a cost perspective, refinishing typically lands in the $3 to $7 per square foot range, depending on floor condition, finish system, and whether stain is involved. That places it well below replacement, which often starts at $10 to $18+ per square foot once removal, materials, and installation are factored in.
At 1 DAY® Refinishing, we see this play out constantly during on-site evaluations. Floors that look “done” often still have years of service left when refinishing is used at the right time, while floors with moisture damage, structural movement, or no usable wear layer do not.
What Hardwood Floor Refinishing Means
Before talking about feasibility, it helps to clear something up. Refinishing is often confused with lighter maintenance or full replacement.
Refinishing means mechanically removing the existing finish and a thin layer of wood, then applying a new stain if needed and rebuilding the protective finish from scratch. The goal is to reach clean, stable wood so the new system can bond properly.
Refinishing vs Recoating
Recoating, often called screen and recoat or buff and recoat, refreshes the finish only. It does not remove scratches that cut into the wood and it does not correct uneven color. Refinishing does. If damage is in the wood itself, recoating will not solve it.
Refinishing vs Replacement
Replacement removes the floor entirely. Refinishing keeps the existing boards. When the structure is sound and enough wood remains, refinishing preserves material and character. When that is no longer true, replacement becomes the only durable option.
Refinishing sits between maintenance and replacement, and it only works when the floor can support it.
Can Your Hardwood Floors Be Refinished
This is the real decision gate. Not every hardwood floor should be refinished, even if it looks worn.
Some floors that look rough refinish beautifully. Others that look “fine” are already at their limits. The difference comes down to construction, remaining wood, and the type of damage present.
Solid Hardwood Floors
Solid hardwood floors are the most forgiving. Full-thickness boards can usually handle multiple refinishing cycles, assuming they have not already been sanded too far.
Most solid floors can be refinished as long as nail heads are not close to the surface and the boards are still stable. Age is rarely the problem. We have refinished solid floors that were many decades old and still had usable material left.
Where risk shows up is sanding history. Each aggressive refinish removes future options, even if the floor looks good immediately afterward.
Engineered Hardwood Floors
Engineered hardwood is more limited. Only the top veneer layer can be sanded, and veneer thickness varies widely. Some engineered floors can be refinished once. Some twice. Many not at all.
The challenge is that veneer depth is not always obvious until sanding begins. Floors that look solid can reach their limit quickly. Once the veneer is gone, there is no recovery.
This is where professional judgment matters most. Refinishing engineered hardwood flooring is about restraint, not correction.
Damage That Refinishing Can Address
Refinishing works well for:
- surface scratches and scuffing
- dull or uneven sheen
- finish breakdown in traffic areas
- sun fading and color shift
- minor dents that have not crushed the wood fibers
These are finish-level problems.
Damage That Stops Refinishing
Refinishing breaks down when damage extends beyond sanding depth:
- severe cupping or crowning from moisture
- deep gouges below the wear layer
- water staining that penetrates the wood
- loose or shifting boards
- floors sanded close to fasteners
In these cases, refinishing may improve appearance briefly, but it will not solve the underlying issue.
Refinishing Feasibility Overview
| Floor Condition | Solid Hardwood | Engineered Hardwood |
|---|---|---|
| Surface scratches / dullness | ✔ Refinishable | ✔ Sometimes |
| Light sun fading | ✔ Refinishable | ✔ With limits |
| Deep gouges | ⚠ Depends on depth | ✖ Usually not |
| Water damage | ⚠ Conditional | ✖ Often stops refinishing |
| Prior heavy sanding | ⚠ May be limited | ✖ High risk |
From what we see on real refinishing projects, this table captures most outcomes accurately.

How Hardwood Floor Refinishing Actually Works
Refinishing is not about making wood new. It is about resetting the surface so the floor can age properly again.
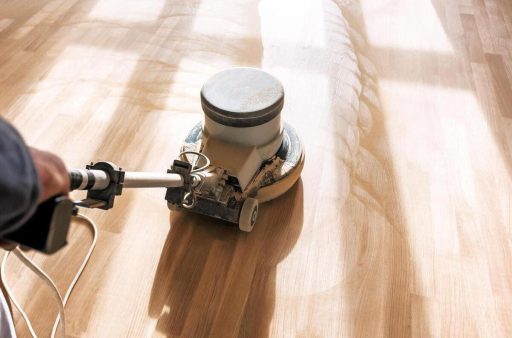
What Sanding Does (High-Level)
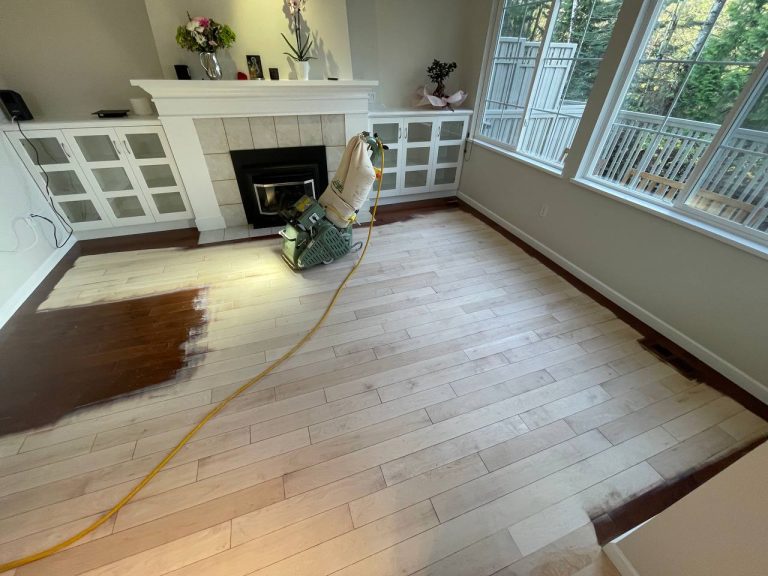
Sanding removes the old finish and a controlled amount of wood. This clears scratches, levels minor unevenness, and exposes clean wood for bonding. The goal is not maximum removal. It is precise removal. Too much sanding shortens the floor’s life. Too little leads to adhesion issues later.
What Happens After the Old Finish Is Removed
Once bare wood is exposed, the floor becomes sensitive. Moisture, residues, and contamination matter. This is where many refinishing failures start, not during sanding. Indoor air quality during sanding and finishing is also affected by airborne dust and volatile organic compounds released by floor coatings, which is why surface cleanliness and curing conditions matter at this stage.
Stain penetrates the wood. Finish builds protection on top. Both depend on clean, compatible surfaces.
Why Stain and Finish Choices Matter
Finish choice affects drying time, curing behavior, light response, and long-term wear. Compatibility between products matters more than many homeowners expect. When finishes peel or chip, it is usually an adhesion or contamination issue, not a sanding problem.
When Full Sanding Isn’t Necessary
Not every worn floor needs full refinishing. Sometimes the wood itself is fine.
- Screen and Recoat: This method lightly abrades the existing finish and applies a new coat. It restores sheen and protection but does not remove wood-level damage.
- Buff and Recoat: Different process, same intent. This refreshes, it does not reset.
When These Options Work
They work when:
- the existing finish is intact
- there is no exposed wood
- scratches are shallow
- color is still acceptable
When They Don’t
They fail when:
- finish is peeling or worn through
- contamination blocks adhesion
- the floor already looks uneven
Recoats often fail first in traffic lanes when conditions are wrong.
DIY Refinishing vs Professional Refinishing
This is not about capability. It is about consequence. DIY refinishing can work on small, forgiving floors with plenty of wood left. Risk increases quickly on larger spaces, engineered floors, or homes where mistakes cannot be hidden.
The most serious DIY failures are permanent. Sanding too deep. Exposing fasteners. Creating uneven surfaces that require even more material removal to fix.
Professional refinishing does not guarantee perfection. It usually reduces irreversible errors. Judgment matters more than equipment.
What Results to Expect After Refinishing
A successful refinish makes a floor look intentional again. Not perfect. Not brand new. Just coherent. The surface reads as one finished plane instead of a collection of worn patches and touch-ups.
That change is visual first, but it also affects how the floor feels day to day. Traffic patterns are less obvious. Light reflects more evenly. The floor stops drawing attention to damage and starts fading back into the space, which is usually the goal.
Appearance and Sheen Changes
After a proper refinish, color looks cleaner and more controlled. Sheen becomes more consistent across the room, especially in areas that were previously worn through or over-polished. Edges between boards tend to look sharper again, not blurred by years of finish breakdown.
There are limits, though. Sheen does not behave the same way on every floor. Wood species, grain structure, lighting, and finish choice all affect how reflective the surface feels. Some floors read softer even at higher sheen levels. Others show reflection more aggressively. That variation is normal and expected.
Texture, Color, and Uniformity
Refinishing removes damage. It does not erase the floor’s history. Natural grain variation, mineral streaks, and older repairs may still be visible after sanding and finishing.
That is not a flaw. It is the boundary of what refinishing is meant to do. The floor should look clean, even, and well cared for, but not sterile. When the goal shifts toward total uniformity, the result is often disappointment or unnecessary wood removal.
Common Reasons Refinishing Fails
Most refinishing failures do not show up immediately. The floor can look fine for weeks or even months before problems start to appear. When issues surface later, they usually trace back to conditions that sanding alone cannot fix.
Structural Problems
Refinishing does not stop movement, moisture intrusion, or subfloor issues. If boards continue to move, if humidity is unstable, or if the structure underneath is compromised, the finish will respond.
Sometimes that shows up as cracking or premature wear. Other times it appears as repeating failure in the same areas. The surface can be renewed, but the behavior of the floor stays the same.
Adhesion and Contamination
This is one of the most common failure points. Residues from previous products, incompatible finish systems, or timing errors during application can prevent proper bonding. In those cases, the damage isn’t cosmetic anymore – issues like over-sanded wood and sanding mistakes permanently reduce how much usable material the floor has left.
At first, the floor may look acceptable. Later, clouding, peeling, or chipping starts to show. Once adhesion is compromised, correction usually means starting over.
Unrealistic Expectations
Refinishing cannot turn damaged wood into new wood. It works within the physical limits of the material. When expectations go beyond those limits, the result rarely matches what was imagined.
At that point, the issue is not technique. It is a mismatch between what refinishing can do and what the floor is being asked to become.
When Refinishing Is No Longer Enough
There is a point where restraint matters more than effort. Floors that have reached sanding limits, taken repeated moisture damage, or lost structural stability do not benefit from another refinish. At that stage, refinishing becomes cosmetic patching. Knowing when to stop is part of professional responsibility. Sometimes preserving what remains and planning for replacement later is the least damaging option. Refinishing is effective when used at the right time, and harmful when pushed beyond its limits.