
Refinishing wood floors without sanding offers a budget-friendly way to restore your worn-out hardwood floors. While traditional floor refinishing typically involves heavy sanding equipment, dust everywhere, and significant expense, there’s actually a simpler solution. Fortunately, chemical refinishing methods can revive your floors without the mess and hassle of sanding. This technique works particularly well for engineered wood floors that can’t withstand multiple sandings, making many homeowners wonder: can you restain engineered wood floors without sanding? The answer largely depends on the thickness of the veneer and the refinishing method used.
When to Refinish Without Sanding vs. Traditional Sanding
Knowing precisely when to choose sandless refinishing versus traditional sanding makes all the difference in achieving beautiful, long-lasting results for your hardwood floors. Understanding the telltale signs and specific scenarios for each method ensures you make the right choice for your flooring needs. Several key indicators suggest your hardwood floors need attention. A dull, lackluster appearance despite regular cleaning points to the worn-out finish.
Additionally, surface-level scratches, scuffs, and minor discoloration signal it’s time for refinishing. Moreover, floors that feel sticky or have areas where the wood appears gray due to moisture exposure require immediate attention. Bare wood exposed in high-traffic zones and water stains indicate compromised protective finish that requires addressing.
Traditional sanding becomes essential under specific circumstances. Deep scratches, gouges, or significant physical damage that penetrate beyond the finish layer demand complete sanding. Furthermore, floors with serious discoloration, permanent cupping, or visible wear patterns cannot be restored through sandless methods.
Sanding also becomes mandatory if:
- The floor has a wax finish over polyurethane
- You want to change the wood’s color completely
- There’s significant unevenness between boards
- Water damage has fully penetrated the wood
Benefits of Refinishing Without Sanding
Sandless refinishing offers numerous advantages that make it an attractive option. First and foremost, this method eliminates the mess associated with traditional sanding — no dust particles landing on surfaces or getting into your home’s nooks and crannies. Subsequently, this reduces the risk of respiratory issues, especially important for households with children, pets, or family members with allergies.
The process proves significantly faster than conventional approaches. While traditional sanding typically requires 4–7 days plus additional curing time, sandless refinishing can be completed in just 1–2 days. Furthermore, the quick turnaround minimizes disruption to your daily routine.
Another notable benefit lies in cost-effectiveness. Since sandless refinishing requires less labor and time, it typically costs less than traditional methods. Additionally, this approach preserves the wood’s original thickness and character, particularly valuable for floors that have undergone multiple sandings.
The method proves especially suitable for:
- Floors with surface-level wear and scratches
- Hardwood with thin top layers
- Vintage floors requiring gentle treatment
- Busy households needing quick solutions
Nevertheless, understand that sandless refinishing results typically last 1–5 years, depending on foot traffic. Therefore, consider your long-term flooring goals when choosing between these methods.
Essential Tools and Materials Needed
Successful wood floor refinishing without sanding starts with gathering the right materials and equipment. A well-prepared toolkit ensures smooth execution and professional results.
Chemical refinishing products
The cornerstone of sandless refinishing lies in selecting appropriate chemical products. A chemical abrasion kit serves as your primary tool, containing specialized solutions that gently remove the top polyurethane layer without damaging the wood underneath.
These kits come in various formulations:
- Basic kits for addressing minor scratches
- Heavy-duty options for deep grooves
- Wood-specific formulas for softwoods or hardwoods
The essential chemical components include:
- Bonding Agent: This adhesion promoter acts like double-sided tape, allowing new finish to stick to existing surfaces
- pH-neutral Floor Cleaner: Choose products specifically recommended by floor manufacturers
- Degreasing Solution: Must be hardwood floor safe
- Wood Filler: For repairing minor imperfections
Notably, avoid products with terms like “refreshes,” “restores,” or “rejuvenates” on their labels, as these might interfere with proper finish adhesion. Instead, opt for low-VOC, water-based finishes that eliminate concerns about lingering chemical odors.
Required equipment
Beyond chemical products, specific tools ensure proper application and optimal results:
1. Basic Tools:
- Mops and clean buckets
- Stiff-bristled brushes
- Clean cloths and rags
- Putty knife
- Applicator pads
- Paint trays
2. Specialized Equipment:
- Orbital floor buffer or rotary floor machine
- Application blocks
- Finish application pads
- Protective floor coating applicators
3. Safety Equipment:
- Protective gloves
- Eye protection
- Shoe covers
- Plastic sheeting
- Painter’s tape
For larger projects, consider renting professional-grade equipment rather than purchasing. Orbital buffers, specifically, prove invaluable for ensuring even application across extensive floor areas.
For ongoing maintenance after refinishing, include:
- Hardwood floor cleaner
- High-traffic polish and restorer
- Maintenance pads
Refinishing floors requires careful preparation and precise execution at every stage to achieve a durable and professional result. Before starting the project, organize your workspace by creating designated areas for different materials. This systematic approach prevents confusion during application and ensures each product remains easily accessible throughout the process. Remember that proper material selection directly impacts the longevity of your refinished floors. Quality products, although potentially more expensive initially, often prove more cost-effective by providing superior results and longer-lasting protection.
Step-by-Step Refinishing Process
Mastering the proper technique ensures flawless results in refinishing wood floors without sanding. Following a systematic approach helps achieve professional-quality outcomes while avoiding common pitfalls.
1. Surface cleaning and preparation
Begin by thoroughly vacuuming the entire floor surface with a soft brush attachment to remove loose dirt and debris. Next, clean the floor using a specialized hardwood floor cleaner or mix 10 parts water with one part white vinegar.
Prior to refinishing, inspect the floor for:
- Loose boards or nails requiring repair
- Wax residue that needs removal
- Contaminants affecting finish adhesion
For floors with wax coating, dampen a rag with mineral spirits and wipe the surface until all wax dissolves completely. This step proves crucial as wax interferes with proper bonding between old and new finishes.
2. Applying bonding agent
Once the floor dries thoroughly, apply a thin, even layer of bonding agent. This chemical adhesion promoter creates microscopic scratches in the existing finish, allowing the new coat to bond effectively. The bonding agent typically requires 90 minutes to dry and must be coated within 4 hours.
For optimal application:
- Mix the bonding agent according to manufacturer instructions
- Work in small sections to maintain consistent coverage
- Use a pole-mounted applicator pad for even distribution
- Avoid leaving puddles or dry spots
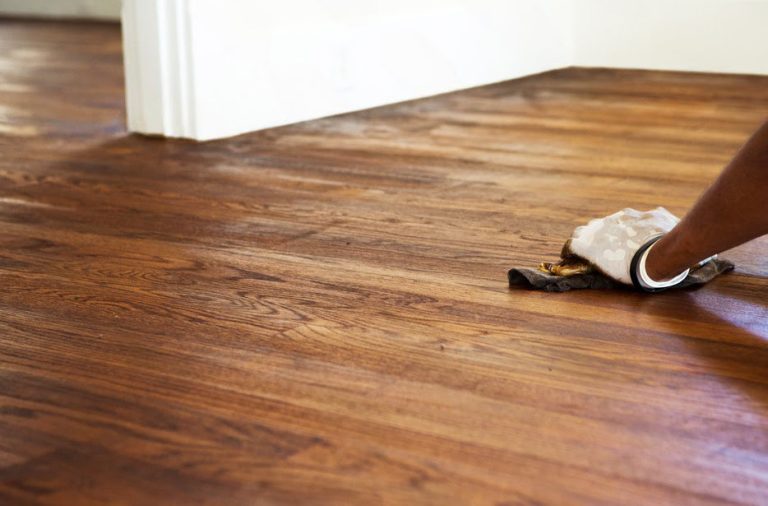
3. Adding new finish coat
After the bonding agent dries, apply the new finish using a t-bar applicator. Make multiple thin coats rather than one heavy application. This technique fills microscopic valleys created during initial application, resulting in a uniform appearance.
For water-based finishes, apply 2–3 coats, allowing proper drying time between applications. Maintain consistent room temperature and humidity throughout the process for optimal results. Remember to keep the buffer moving continuously, stopping every five minutes to clean the application pad.
Drying and curing time
Understanding the distinction between drying and curing times proves essential for long-term durability. Water-based finishes typically dry within 2–8 hours, whereas oil-based products require 4–24 hours. However, drying merely indicates the surface feels touch-dry.
Full curing takes considerably longer:
- Water-based finishes: 7–14 days
- Commercial grade finishes: 3 days
- Oil-based products: 7–28 days
Light foot traffic becomes possible 24 hours after the final coat. Still, avoid placing furniture until the finish dries completely. For area rugs, wait a full week before placement to ensure proper curing. This patience prevents uneven finish and potential adhesion issues that might compromise the floor’s appearance.
Throughout the drying period, maintain proper ventilation and consistent room conditions. This approach ensures even curing and optimal finish hardness. Remember that rushing this final stage might result in premature wear or damage, undermining the entire refinishing process.
Summary
Refinishing hardwood floors without sanding offers a practical solution for homeowners seeking quick, cost-effective floor restoration. If you’re still asking, can you restain engineered wood floors, remember that sandless refinishing works best for surface-level wear rather than deep damage. Through proper technique and regular upkeep, you can extend the lifespan of your engineered wood floors while maintaining their natural beauty.