
Before sanding begins, a flooring professional is not just looking at scratches. That’s the part most homeowners see first, of course. But the real question is bigger: can this floor be sanded safely, will the work actually improve it, and does anything need to be fixed before the machines come out?
So, what is checked before sanding hardwood floors? The main checks are floor thickness, remaining wear layer, past sandings, moisture movement, loose boards, squeaks, exposed fasteners, surface contamination, unknown coatings, stains, repair areas, and subfloor stability. Each one can change the plan.
Some floors look rough and still make good candidates. Dull finish, grey traffic lanes, shallow scratches, worn sheen – those can often improve if the floor has enough material left and the wood is stable. Then you get the other kind. Floors that look “fine” from the doorway, but fail inspection because they are too thin, actively cupped, contaminated with wax, or hiding fastener hazards.
That is why a pre-sanding inspection matters. It decides feasibility, cost, risk, and outcome quality before the project goes too far. In some cases, sanding is worth it. A recoat may make more sense in others. Repairs may need to happen first too. And sometimes, to be honest, the floor just will not give the homeowner the result they are expecting.
At 1 DAY® Refinishing, this is where the real judgment happens. The inspection is not a formality. It is the point where a professional decides whether sanding will help the floor or make the wrong problem worse.
Can the Floor Be Sanded Again?
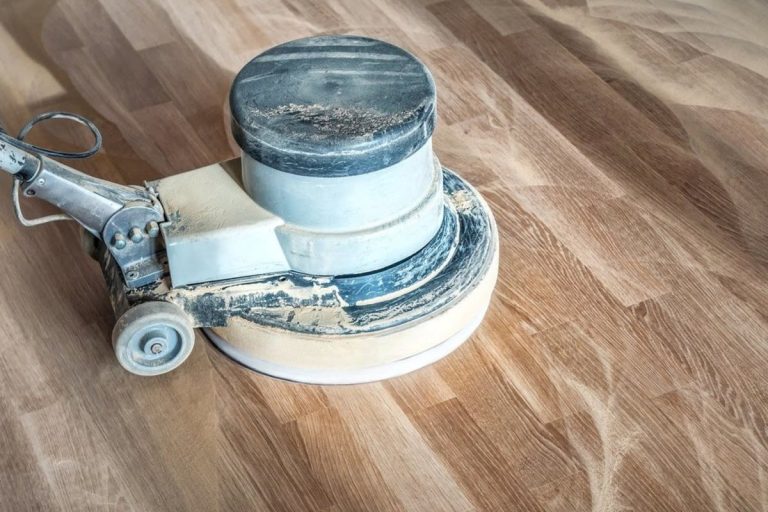
The first serious question is simple: is there enough floor left to sand? A hardwood floor can only be sanded so many times. Each full sanding removes material. Not much in one pass, but it adds up. A floor that has been sanded a few times may look normal from above, yet have very little usable wood left above the tongue, groove, nails, or staples.
This is where “it looks fine” can fool people. Homeowners usually judge the surface. A flooring contractor has to judge what is left under it. If the floor is too thin, sanding can expose fasteners, weaken board edges, reveal tongue-and-groove lines, or make the floor look worse once the work starts. That is why how thick hardwood floors need to be refinished matters before anyone decides on full sanding.
Solid hardwood usually gives more room to work with, but it is not unlimited. Engineered hardwood is more restricted because only the top wear layer can be sanded. Some engineered floors have enough wear layer for refinishing. Others have a thin veneer that should not be sanded at all.
Past sanding history matters too. If nobody knows how many times the floor was refinished, the inspection looks for clues: low board edges, visible fasteners, thin wear at transitions, uneven board height, and previous sanding patterns. This is also where sanding risk becomes part of the refinishing conversation. Refinishing is not automatically damaging, but sanding a floor with too little material left can be. The real question is whether enough material can be removed without cutting into the floor’s limits.
When the answer is yes, sanding may be a good option. When the answer is no, the plan needs to change before the floor is put at risk.
Moisture and Movement
Once the floor passes the thickness check, movement comes next. A floor can have enough wood left and still be a poor sanding candidate if moisture is moving the boards. Wood reacts to moisture. It expands, shrinks, cups, crowns, gaps, and sometimes buckles. A pre-sanding inspection checks those patterns because sanding a moving floor can lock in the wrong shape.
Cupping means the board edges are higher than the centre. Crowning is the opposite: the centre is higher than the edges. Sometimes crowning appears after a cupped floor was sanded too soon. Once the floor dries and changes shape, the sanding cut can look wrong.
That is why cupping and crowning are movement flags, not just cosmetic details. The question is whether the issue is old and stable or still active. If moisture is still coming from a leak, crawlspace, slab, entry door, kitchen area, pet zone, or basement condition, sanding will not solve the cause. NWFA guidance on wood floor problems often comes back to moisture, movement, and site conditions. A flat-looking result depends on the floor being stable enough to accept the work. If the wood is still gaining or losing moisture, the finished surface may change after sanding.
Not every gap or seasonal change stops a project. Floors move with indoor humidity. A contractor has to separate normal movement from warning signs. Small winter gaps may not be a concern. Fresh cupping, dark edges near a doorway, or movement in one damp section is a different conversation.
The decision is simple: if the floor is still moving because of active moisture, sanding should wait or the cause needs to be corrected first.
Loose Boards, Squeaks, and Fasteners: What Must Be Fixed First
A sanding machine needs a stable surface. If boards are loose, squeaky, bouncing, or shifting underfoot, the floor may not sand evenly. Worse, the movement can stay visible after refinishing and make the finished floor feel unfinished even if the coating looks clean.
Loose boards are a repair-first issue. They can chatter under the sanding equipment, create uneven sanding marks, or open gaps that collect finish. Squeaks in hardwood floors can point to board movement, loose fasteners, subfloor movement, or friction between boards. Sanding may make the floor look fresher, but it does not tighten a loose floor by itself.
Fasteners are another check that homeowners rarely think about – and yes, they matter more than people expect. Nails, staples, face nails, and fastener pops can damage abrasives and equipment. They can also create sparks, leave metal marks, or become visible after the floor is sanded flatter. If a nail head is already close to the surface, it may also be a clue that the floor has lost too much thickness from past sanding.
This is where projects can go sideways fast. A floor may seem ready because the scratches are obvious, but once sanding starts, a missed staple or raised nail can tear a belt or cut a visible line into the floor. A loose board can sand differently from the boards around it. A squeaky area can still squeak after the finish is perfect. The goal is not to repair every small sound in an old house. The goal is to identify the problems that affect sanding safety, finish quality, and the floor’s long-term feel. If the floor needs fastening, board replacement, or subfloor attention, that should be known before sanding begins.
Surface Contamination: Wax, Cleaners, Silicone, and Unknown Coatings
A floor can be thick enough, dry enough, and stable enough, but still have a coating problem on the surface. Surface contamination is one of the quieter causes of refinishing failure. Wax, polish, residue-building cleaners, oils, silicone sprays, and unknown coatings can all affect how a new finish bonds. Homeowners often do not know these products are still on the floor because the residue may be invisible. Sometimes the surface feels slick or waxy. Sometimes there is no clear clue.
Wax is a common problem. It can sit in the grain, seams, bevels, and old finish layers. Cleaner residue can build up over time too, especially from products that leave shine behind. Silicone is even more frustrating because small amounts can cause craters, fish-eyes, or adhesion problems in the new finish.
Unknown coating history makes the decision harder. If nobody knows what is on the floor, the contractor has to think about compatibility before recoating or applying a new system. “Coat over unknown” is risky because the new finish may not bond to the old surface. More finish does not fix poor adhesion. It just gives the failure more material to peel or flake later.
Manufacturer guidance matters here. Finish systems are designed around specific bonding conditions, surface prep, and compatibility rules. The homeowner does not need a chemistry lesson. The contractor just needs to know whether the existing surface can accept the next finish system.
That is why sanding and recoating are different decisions. If the floor only needs a recoat, compatibility becomes the main question. If the floor needs full sanding, contamination still matters because residue can remain in seams, gaps, bevels, or stained areas. Either way, surface history can change the plan before any finish is chosen.
Stains, Repairs, and Blend Reality: What Can and Can’t Disappear
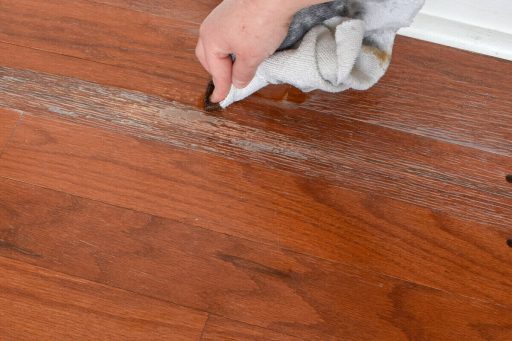
The most honest part of a pre-sanding inspection is expectation setting. Sanding can make many floors look much better, but it cannot erase every mark from the floor’s history. Pet stains are a good example. Some lighten. Some remain. Urine can go below the sandable surface and react with the wood. Black stains can also point to moisture, tannin reaction, metal reaction, or deeper damage. If the discoloration is too deep to sand safely, it may still show after refinishing.
Water stains work the same way. A light surface mark may improve. A deep black mark near a planter, radiator, doorway, dishwasher, or pet area may not disappear. That should be clear before the homeowner pays for a result sanding cannot honestly deliver.
Repairs need realistic expectations too. Board replacements, old patches, lace-in repairs, and previous repair areas may sand clean but still blend differently. New boards can take stain differently from older wood, and grain, species, age, sun exposure, and finish history can all affect the final look.
This is where “blend reality” matters. The goal may be to soften the contrast, not make every repaired area invisible. A good refinish can help the floor feel more unified, but it cannot always make old and new wood behave the same. Subfloor context can affect expectations too. If boards are moving because the subfloor is loose, weak, uneven, or moisture-affected, the surface finish may not be the real problem. High spots can sand faster. Low spots may hold old damage. Bounce or hollow areas may remain if the cause sits below the hardwood.
A useful inspection separates what can improve from what cannot. That saves money, avoids disappointment, and helps the homeowner choose between sanding, repair, replacement, recoating, or accepting some character.
Common Inspection Findings That Change the Sanding Plan
The table below shows how small inspection details can change the decision before sanding starts.
| Issue Found During Inspection | Risk If Ignored | What It Changes Before Sanding |
|---|---|---|
| Floor is too thin or previously over-sanded | Exposed fasteners, weak board edges, poor sanding result | May stop full sanding or shift the plan away from refinishing |
| Thin engineered wear layer | Sanding can cut through the veneer | Requires product check before refinishing is approved |
| Active cupping or crowning | Floor may change shape after sanding | Moisture source and stability must be addressed first |
| Loose boards or squeaks | Uneven sanding, movement, noise after refinishing | Repair or fastening may be needed before sanding |
| Nails, staples, or fastener pops | Equipment damage, metal marks, visible defects | Fastener hazards must be handled before machines run |
| Wax, cleaner residue, silicone, or unknown coatings | Poor adhesion, peeling, fish-eyes, coating failure | Finish compatibility and surface readiness must be confirmed |
| Pet stains or black stains | Stains may lighten but remain visible | Sets expectations or points to board replacement |
| Patch areas or replacement boards | Uneven colour, grain, or stain absorption | Blend expectations must be discussed before finishing |
| Subfloor movement or unevenness | Sanding may not solve the real problem | Stability issue may need repair or a different plan |
The Checks That Decide Whether Sanding Is Worth It
A good pre-sanding inspection follows a clear sequence. First, check whether the floor has enough usable material left. Then confirm engineered wear layer limits, past sanding history, and signs of over-sanding. After that, look for moisture and movement problems such as cupping, crowning, buckling, or active moisture.
If the floor is stable enough, the next check is repair-first issues: loose boards, squeaks, bounce, nails, staples, and other fastener hazards. Then the surface history matters. Wax, cleaners, silicone, unknown coatings, and poor finish compatibility can all change the plan.
Last, the inspection sets expectations around stains, repairs, patches, subfloor stability, and blend reality. If the floor is thick, dry, stable, clean, and realistic to improve, sanding may be worth it. If the floor is too thin, actively moving, contaminated, or unlikely to meet the expected result, the better decision may be repair, recoat, replacement, or a different plan. Inspection decides that before sanding begins.