
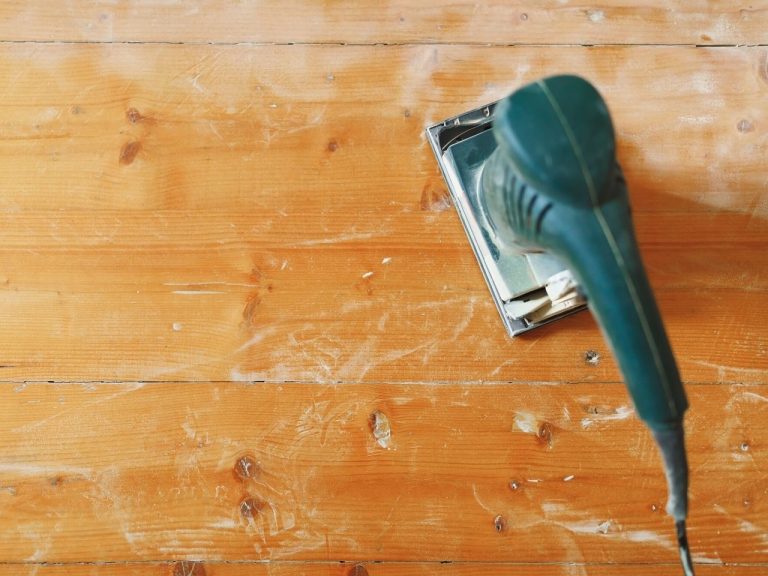
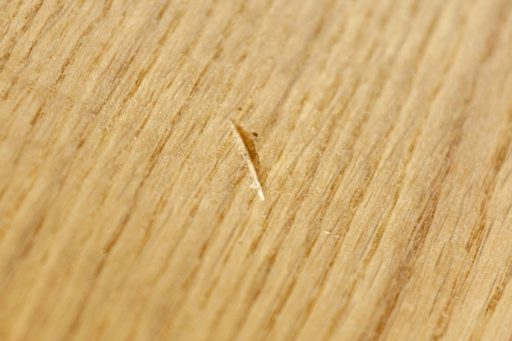
Sanding marks on hardwood floors show up in a few familiar forms – swirl marks, straight lines, drum marks, edge scratches. Sometimes they’re obvious right away. Other times the floor looks perfectly clean while it’s raw, then the stain or finish goes down and suddenly every mistake jumps out. That second scenario is the one we see most often.
From our experience at 1 DAY® Refinishing, sanding marks rarely mean the floor is ruined. In many cases, they can be corrected without starting the entire sanding process over. But there’s a catch. The wrong fix – especially aggressive re-sanding – can do permanent damage faster than the original mistake. This guide is about fixing sanding marks without making the floor worse. We’ll walk through how to identify different types of sanding defects, how deep they really are, what correction methods actually work, and where the hard stop points are – especially with engineered hardwood.
If you’re standing there wondering whether one more sanding pass will fix the problem or destroy the floor, you’re in the right place.
Quick Fix Guide: How to Remove Sanding Marks Without Starting Over
Before tools come out, the first step is classification. Not all sanding marks are equal, and treating them the same is how floors get over-sanded. We break it down into cosmetic defects versus structural ones.
When Sanding Marks Are Only Cosmetic
Cosmetic sanding marks live within the existing scratch pattern. They’re usually shallow and uniform, even if they look ugly under certain lighting. Common examples include:
- Light swirl marks from orbital or finish sanders
- Faint straight lines that don’t catch a fingernail
- A hazy or fuzzy appearance when the floor is dry
Here’s a real-world test we use all the time. Wipe the floor with water. If the marks fade or disappear while wet and then come back as it dries, the defects are almost always cosmetic. The scratch pattern exists, but it hasn’t been fully blended.
These marks are typically fixable with screening or light buffing. No heavy sanding. No aggressive pressure. The goal isn’t to remove wood – it’s to make all scratches sit at the same depth so they stop reflecting light differently.
This is where restraint matters. Overcorrecting cosmetic marks is one of the most common causes of over-sanding.
When the Floor Needs More Than a Touch-Up
If sanding marks behave differently, the fix changes completely. Red flags include:
- Straight lines you can feel with a fingernail
- Drum stop marks that stay visible even when wet
- Dark scratches that cut across grain
- Edge areas that look rougher or lower than the field
These defects sit below the surface scratch pattern. Screening won’t reach them. Buffing won’t erase them. Trying to force a light fix here just burns sanding capacity without solving the problem.
At this stage, re-sanding may be required – but only if the floor has enough wood left to support it. That’s where experience and judgment come in.
Step-by-Step: Fixing Sanding Marks Based on Severity
The safest fix is always the one that removes the least amount of wood needed to solve the problem. Below is how we approach different defect types on real sanding projects.
Light Swirl Marks from Finish Sanders
Swirl marks are usually circular patterns caused by orbital or finish sanders that stayed in one spot too long or ran with worn abrasives. They’re shallow, but highly visible under finish. What makes swirls tricky is that they often disappear when the floor is raw. Then the first coat of finish goes down and suddenly the floor looks like it was polished with steel wool.
The fix here is controlled blending:
- Use a buffer with fresh sanding screens
- Work through a proper grit progression
- Keep the machine moving at all times
You’re not chasing individual swirls. You’re unifying the entire scratch pattern so light reflects evenly across the surface, which aligns with NWFA guidance on scratch patterns becoming visible after sanding. When that’s done right, the floor looks consistent under side lighting before any finish is applied.
If you can still see circular patterns at that stage, they won’t magically disappear. Once finish goes down, those swirls usually stand out even more.
Straight Lines and Drum Marks in the Field
Straight sanding lines usually come from skipped grits, uneven pressure, or inconsistent machine speed. Drum marks happen when the sander drops or stops while engaged.
A common mistake here is spot sanding just the visible line. That often removes the line but leaves a low spot or wave that shows up once finish levels out.
The correct approach is zone-based:
- Reset the scratch pattern in the affected area
- Feather the repair well past the visible defect
- Finish with screening to blend transitions
If the defect catches a fingernail, screening alone won’t fix it. That’s the point where honesty saves floors.
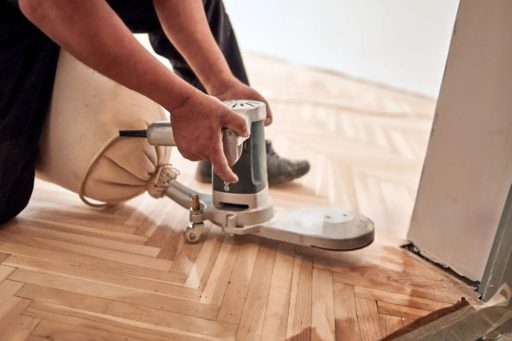
Edge Marks and Blending Problems
Edge marks are one of the most frequent sanding failures we see. The field looks decent, but the perimeter has heavy scratches or a dull halo. This almost always means the edging wasn’t blended into the main sanding passes.
Fixing edge marks involves:
- Light re-sanding at the perimeter
- Gradual blending outward with a buffer
- Careful inspection under side lighting
If the edge looks noticeably lower than the field, be cautious. That’s often a sign that too much material has already been removed.
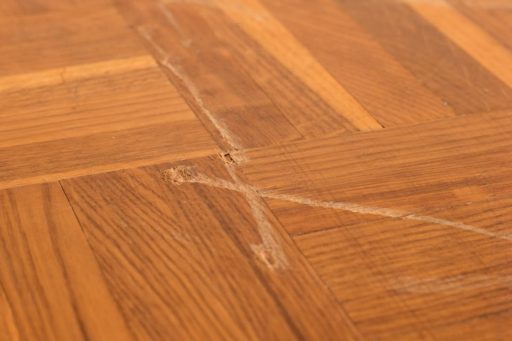
Deep Scratches That Cut Below the Scratch Pattern
Deep scratches don’t fade when wet. They don’t soften under screening. They stay visible no matter what.
These usually come from debris trapped under a sander, damaged abrasives, or excessive pressure. At this point, the only real fix is to sand past the depth of the scratch and rebuild the scratch pattern correctly.
This is also where wax fillers fail completely. Deep sanding scratches aren’t missing material – they’re uneven abrasion. Filling them with wax only hides the color difference temporarily. The scratch depth is still there, and once light or finish hits it, the defect comes right back.
That means:
- Starting at a coarser grit
- Resetting the surface
- Working back up gradually
If the floor can’t support that level of removal, stopping is the correct decision.
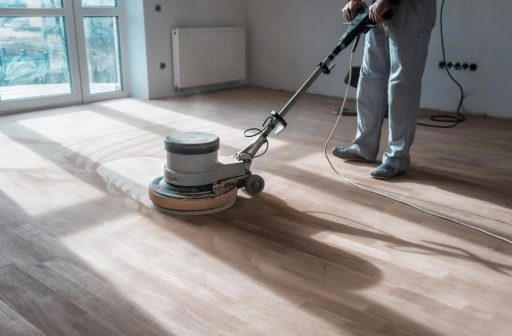
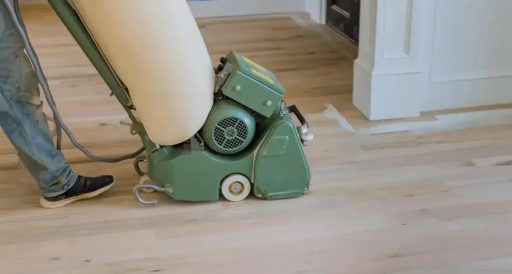
When Full Re-Sanding Is the Only Clean Fix
Sometimes defects are everywhere. Swirls in one room. Lines in another. Chatter across the entire floor.
At that point, partial fixes won’t produce a consistent result. A full re-sand may be the only way to achieve a clean surface – if the floor has enough thickness left. If you want a clearer picture of what proper sanding actually involves – from grit progression to final inspection – we break the full process down in our guide to sanding hardwood floors.
Over-Sanding: How Fixing Sanding Marks Can Go Too Far
Most floors aren’t ruined by bad sanding. They’re ruined by trying to fix bad sanding without understanding the limits.
How Much Wood Is Actually Safe to Remove
Solid hardwood floors are forgiving. They’re thick and designed to handle multiple sanding cycles over their lifespan.
This is also where the type of hardwood floor matters more than most homeowners expect. Solid hardwood, engineered hardwood, and even different engineered constructions behave very differently once sanding corrections begin.
With solid hardwood, there’s usually more margin for error. With engineered hardwood, everything depends on veneer thickness and core construction. Some engineered floors can handle light corrective sanding. Others are already at their limit after one full refinish. Treating all hardwood floors the same during sanding correction is one of the fastest ways to cause irreversible damage.
Engineered hardwood is different. The wear layer – the real wood on top – may only allow one or two light sandings total. Manufacturers publish sanding limits, and according to NWFA sanding guidelines, each corrective pass should be as conservative as possible.
Visual and Physical Signs of Over-Sanding
On real jobs, over-sanding shows up as:
- Sudden color shifts
- Soft, fuzzy grain that won’t sharpen
- Uneven board edges
- Finish soaking in unpredictably
Once these signs appear, no amount of technique will fix the damage.
Why Engineered Hardwood Fails Faster
Engineered floors fail faster because the usable sanding surface is extremely thin and there’s no visual warning before you reach the limit. On solid hardwood, you’re removing the same material all the way through. Scratch depth, color, and grain stay consistent as you sand. You can usually tell when you’re getting close to a problem.
Engineered hardwood works differently. The top wear layer is real wood, but underneath it is a different core material. As sanding removes that wear layer, everything looks normal right up until the moment it isn’t. One pass can still look fine. The next pass suddenly exposes the transition between layers.
That’s when the color changes, the grain looks wrong, or the surface turns blotchy. At that point, no amount of blending fixes it because you’re no longer sanding wood evenly – you’ve crossed into the construction layer. That’s why engineered hardwood flooring requires lighter corrections and fewer attempts. There’s very little margin for error. Once the veneer is compromised, sanding stops being a repair option and replacement becomes the only clean solution.
Why Sanding Marks Happen (Technique, Tools, and Work Quality)
Understanding the cause helps prevent repeating the same mistake.
- Skipped Grits and Poor Scratch Pattern Control
Skipping grits saves time – until it doesn’t. Deep scratches from early grits don’t disappear on their own. Finer grits just polish around them. Those scratches often hide until stain or finish amplifies them. - Machine Speed, Pressure, and Dirty Abrasives
Too much pressure digs grooves. Moving too fast creates chatter. Worn abrasives introduce random scratch patterns that never blend properly. We replace abrasives frequently. It costs more, but it saves floors. - Rushed Work and Inexperienced Crews
Rushed sanding jobs skip inspections and blending. Inexperienced sanding crews rely on machines instead of reading the floor. That’s how defects sneak through unnoticed. - Poor Lighting and Missed Final Inspection
Overhead lighting hides defects. Side lighting reveals them. If sanding marks aren’t visible under low-angle light before finish, they won’t magically appear later. If they are visible, they’ll look worse once coated.
How to Inspect a Floor Before Stain or Finish Goes Down
Inspection is where most sanding mistakes are caught – or missed.
- Using Side Lighting and Low Angles
Shine light across the floor, not down at it. Move around. Get low. Side lighting exposes scratch direction, depth, and consistency far better than overhead fixtures. - Water or Solvent Wipe Tests
A water or solvent wipe temporarily mimics how finish will behave. If sanding marks pop during the wipe, they’ll pop under finish. If they don’t, you’re likely safe to move forward.
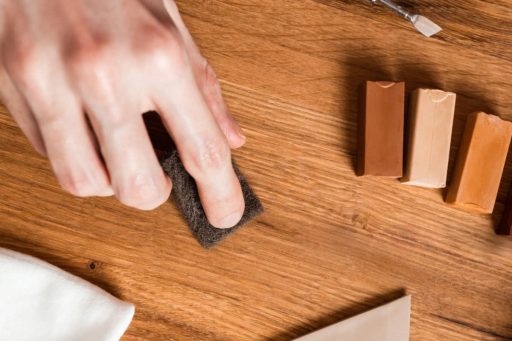
Some homeowners try to mask light sanding marks with wax pencils or fill sticks at this stage. It’s understandable – wax can soften contrast and make small scratches less noticeable from certain angles. But that’s concealment, not correction. Wax doesn’t change the scratch pattern or level the surface. If the floor is still being sanded, stained, or finished, wax usually creates more problems than it solves.
When to Fix It Yourself and When to Call a Professional
This is the part most homeowners struggle with. Not because the fixes are complicated, but because the risk isn’t obvious until it’s too late. Sanding marks feel like something you should be able to “just clean up.” Sometimes that’s true. Sometimes it’s how floors get ruined.
From what we see on real jobs, the line between DIY and professional repair isn’t about confidence. It’s about how much margin for error the floor still has.
Situations Where DIY Corrections Are Reasonable
DIY corrections make sense when the problem is clearly surface-level and the fix doesn’t require removing more wood. Good DIY candidates usually look like this:
- Light swirl marks that fade when the floor is wiped with water
- Very faint sanding lines that don’t catch a fingernail
- Uniform scratch patterns that just weren’t fully blended
- Floors that haven’t been stained or finished yet
In these cases, screening or light buffing with the right abrasives can work well. The key is control. One or two careful passes, proper grit choice, and constant inspection under side lighting.
This is also where wax pencils or wax fill sticks sometimes come up. Some homeowners use them to soften the look of tiny scratches or pin-sized defects on a fully cured floor that isn’t scheduled for refinishing again. Used that way, wax can reduce color contrast and make a minor flaw less noticeable from standing height.
But here’s the boundary. Wax doesn’t level the surface. It doesn’t fix scratch depth. Swirl marks, straight sanding lines, and drum marks are abrasion problems, not missing material. Wax only hides them temporarily, and often only from certain angles.
There’s also a future risk. Wax contaminates the surface. If the floor ever needs screening or recoating later, adhesion problems are common. We’ve had to sand past wax residue just to get finish to bond again.
So for DIY work, the rule is simple – use abrasion to fix sanding problems. Treat wax only as a cosmetic cover on floors that are essentially done with their refinishing life.
Red Flags That Mean the Floor Needs Expert Repair
There are moments where continuing on your own stops being productive and starts being dangerous for the floor. Strong red flags include:
- Sanding marks that stay visible when the floor is wet
- Scratches you can feel clearly with a fingernail
- Color shifts starting to appear during sanding
- Any sanding issue on engineered hardwood where veneer depth is unknown
Another big one is hesitation. If you’re standing there unsure whether the next sanding pass will fix the problem or break through the wear layer, that’s not a moment to push forward. That’s usually when irreversible damage happens.
Engineered floors are especially unforgiving. One pass looks fine. The next suddenly changes color or exposes the core layer. At that point, there’s no blending or hiding it.
Professionals aren’t better because they sand more aggressively. They’re better because they know when not to sand.
What to Ask a Contractor Before They Touch the Floor Again
If you do bring in a professional, asking the right questions matters as much as who you hire. Good questions include:
- How will you confirm whether the sanding marks are cosmetic or structural?
- How much wood do you expect to remove during correction?
- How will you inspect the floor before stain or finish goes down?
- What are the risks if we try to push the correction further?
Be cautious of anyone who promises they can “just sand it out” without first talking about wear layer limits, especially on engineered hardwood. A competent contractor explains the tradeoffs, not just the technique.
From our side at 1 DAY® Refinishing, this is exactly how we approach projects. We’d rather tell someone a correction isn’t safe than take on work that shortens the life of their floor.
Getting a Clean Floor Without Making It Worse
Sanding marks look like mistakes, but they don’t have to become disasters. Floors usually get damaged not by the defect itself, but by trying to fix it without understanding depth, limits, and risk.
From our experience at 1 DAY® Refinishing, the best results come from judgment, not force. Light defects need light corrections. Deeper issues call for an honest look at what the floor can safely handle, and sometimes the right move is knowing when to stop. That kind of decision-making comes from working on real floors every day. Our crews focus on fixing problems without shortening the life of the floor, so it looks right now and stays serviceable years down the line.