

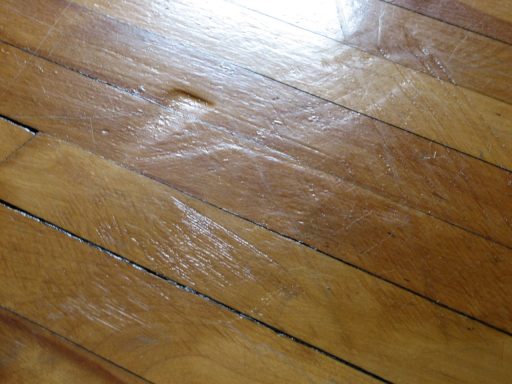
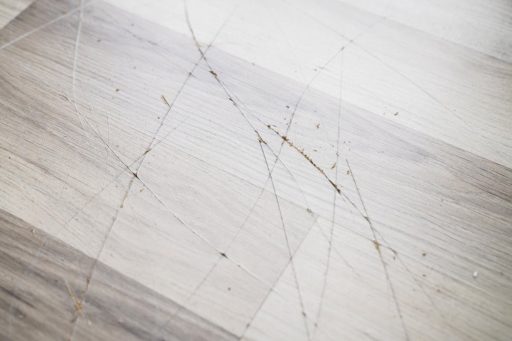
Scratches on wood floors are normal. Furniture shifts. Grit gets dragged inside. Pets slide around corners. Even careful homes pick up marks over time. The problem usually isn’t the scratch itself. It’s knowing what kind of scratch you’re dealing with.
Most panic fixes assume every scratch should disappear. That’s where floors get into trouble. Some scratches sit in the finish and respond well to correction. Others cut into the wood and never fully go away. Treating both the same leads to layered spot fixes that change how the floor reflects light. At 1 DAY® Refinishing, we see this when spot repairs start to stand out more than the original scratch.
Identify the Scratch and the Finish
This is the section that matters most. Nearly every failed scratch fix we run into traces back to one issue. Either the scratch depth was misjudged, or the finish was misunderstood.
Finish Scratch vs Wood Scratch (Fingernail Test)
The fingernail test still works. Not as a strict rule, but as a reality check. When you run your nail across the scratch and feel nothing, the damage is usually confined to the finish. A nail that catches often means the finish has been breached. When it drops into the scratch, you are dealing with wood damage. How much usable finish thickness remains is what ultimately determines whether surface correction is realistic or already near its limit.
This same distinction is outlined in NWFA technical guidance, which separates surface scratches confined to the finish from deeper scratches and gouges that tear wood fibers and cross grain direction, often increasing the likelihood of permanent damage. How much usable finish thickness remains is what ultimately determines whether surface correction is realistic or already near its limit.
Visual cues alone are unreliable. Some scratches look deep because they break light, not because they cut into the wood. Others barely show until sunlight or a hallway light hits them just right. That is why a scratch can disappear during the day and suddenly stand out at night.
Touch tells you more than color. A scratch that looks white or gray might still be finish-only. A darker scratch is not automatically deep. Misreading this is how people overcorrect. Sanding, filling, or aggressively touching up a spot that did not need it usually widens the damage instead of improving it.
Why the Finish Type Matters
Finish type controls how forgiving any scratch repair can be. Some finishes blend reasonably well. Others do not. Some age evenly. Others highlight every difference in sheen.
Older oil-based finishes amber over time. Water-based finishes stay clearer but show sheen differences faster. Factory-finished floors often use harder coatings that resist spot blending almost entirely. Waxed floors behave differently again, because the scratch affects both appearance and how the surface performs afterward.
The point is not perfect finish identification. It is understanding that compatibility limits how invisible a repair can become. When a fix hazes, flashes, or turns patchy weeks later, it is usually a finish interaction problem, not poor effort.
This is also where expectations need adjusting. A repair that looks fine from one angle but shows from another may be performing exactly as the surface allows.
Scratch Depth vs Realistic Outcome
This comparison is where most decisions should slow down. Scratch depth determines not just whether improvement is possible, but what kind of result is realistic without creating new visual problems.
| Scratch Type | What’s Actually Damaged | Realistic Outcome |
|---|---|---|
| Light surface scratch | Finish only | Often removable, may reappear under certain light |
| Medium scratch | Finish breached, shallow wood contact | Can be blended, rarely invisible |
| Deep scratch / gouge | Wood fibers removed | Improvement only, not true removal |
How to Fix Scratches on Wood Floors
Once the scratch and the finish are understood, the word “fix” starts to mean something more specific. This section is not about techniques. It is about outcomes and limits.
Light Surface Scratches (Finish Only)
These scratches are repaired without cutting into the wood. In practice, this means surface abrasion and recoating, often referred to as screening and recoat. The goal is to level the existing finish and rebuild a uniform protective layer so light reflects evenly again.
Because the wood itself is untouched, results can look very clean at first. The limitation is that this process does not reset wear. As traffic continues and the surrounding finish thins, the scratch may become visible again under certain lighting conditions.
Medium Scratches (Blending and Touch-Ups)
Medium scratches break through the finish but do not remove much wood. These are typically addressed through localized sanding and blending, followed by touch-up work to reduce contrast before a new finish layer is applied.
The scratch is softened rather than erased. Because sanding is limited to small areas, sheen and texture differences can develop over time, especially if multiple spot repairs are done instead of treating the floor as a whole.
Deep Scratches and Gouges (Repair Limits)
Deep scratches and gouges remove wood fibers, which changes the process entirely. These areas require sanding that cuts into the wood to level damage, often followed by filling, blending, and full refinishing to restore a consistent surface.
When this type of damage appears repeatedly, spot sanding stops being effective. At that point, full hardwood floor refinishing becomes the practical solution, not to eliminate every scratch, but to reset the surface so repairs no longer stand out individually.
How to Restore Shine Without Patchiness
Shine is where many scratch repairs fall apart. Even when color looks right, uneven sheen gives the repair away immediately. This usually happens when localized touch-ups are used instead of treating the finish as a continuous surface.
Patchiness occurs because shine is not local. It is a floor-wide visual condition created by how the finish reflects light across the entire surface. Processes like buffing or screening and recoating work because they address sheen uniformly, while isolated spot treatments leave reflection differences that draw the eye faster than the original scratch.
Another common issue is finish buildup. Repeated spot corrections add material unevenly, creating halos where repaired areas look glossier or duller than the surrounding floor. These halos often become more noticeable weeks later as the surface settles and traffic wears the floor inconsistently.
This is why scratches sometimes look fixed at first … until they do not. The scratch did not return. The surrounding finish simply continued to age, while the repaired area did not.
Restoring uniform shine usually means stepping beyond the scratch itself. When consistency can no longer be achieved through isolated blending or touch-ups, broader surface processes like full recoating – or in some cases complete refinishing – become the only way to bring the floor back into visual balance.
If restoring shine requires overlapping spot corrections, that is usually the surface signaling that it needs a broader solution rather than more intensity in one small area.
Red Flags: Exposed Wood and Widespread Damage
Exposed wood is the clearest signal. Once the finish is breached, moisture becomes a factor. Even indoor humidity can darken exposed fibers over time, locking in contrast that becomes harder to blend later. Widespread scratching is another red flag. When damage shows up across traffic paths, entries, or large zones, spot repairs start competing with each other visually. Each fix makes the next one harder.
Uneven sheen that keeps getting worse is another sign. When the repair draws more attention than the scratch, effort is being wasted. This often happens when material has already been pushed past what the surface can tolerate.
A professional evaluation does not automatically mean refinishing. It means someone looks at the surface as a system instead of a collection of marks and helps decide whether continued spot work is helping or hurting.
Scratches on Engineered Wood Floors (Key Limits)
Engineered wood floors require extra caution. The wear layer is limited, and once it is compromised, options narrow quickly. Light finish scratches behave much like solid wood. Medium scratches are less forgiving. Deep scratches hit limits fast because there is less material to work with. Aggressive correction can cut through the wear layer entirely, creating permanent damage.
There is also the blending issue. Many engineered floors use factory-applied finishes that do not blend well with localized repairs. The scratch may soften, but the surrounding sheen often refuses to cooperate. That is why engineered floors reach the stop point sooner than expected. Knowing that early prevents irreversible mistakes.
How to Prevent New Scratches
Prevention is not about treating the floor like glass. It is about removing predictable stress. Most scratches come from movement. Furniture sliding. Chairs shifting. Grit grinding underfoot. Adjusting those patterns reduces damage without changing how the space is used.
Entry points matter. Grit does more damage than weight. Pets add repetition, not impact. Traffic paths concentrate wear.
None of this stops scratches completely. It just slows how quickly small marks turn into cumulative problems. A floor that wears evenly almost always looks better than one that is constantly spot-fixed. Simple care habits go a long way toward keeping wear predictable instead of concentrated.
Choose the Fix by Depth and Finish
Fixing scratches on a wood floor is not about finding a trick. It is about choosing the right expectation. Finish-only scratches can often be corrected through surface work, though they may show again under certain lighting. Medium scratches usually improve with blending and localized sanding, but rarely disappear. Deep scratches and gouges set a clear limit. At that point, improvement replaces erasure.
Shine matters as much as color. Uneven sheen can make a decent repair look worse than the original scratch, and repeated spot fixes eventually create more visual noise than they solve. At 1 DAY® Refinishing, this is often where floors transition from isolated touch-ups to sanding and full refinishing because surface consistency has been lost.
The best decisions come from understanding scratch depth, finish behavior, and knowing when isolated effort stops helping. Once those lines are clear, the right choice usually follows.