
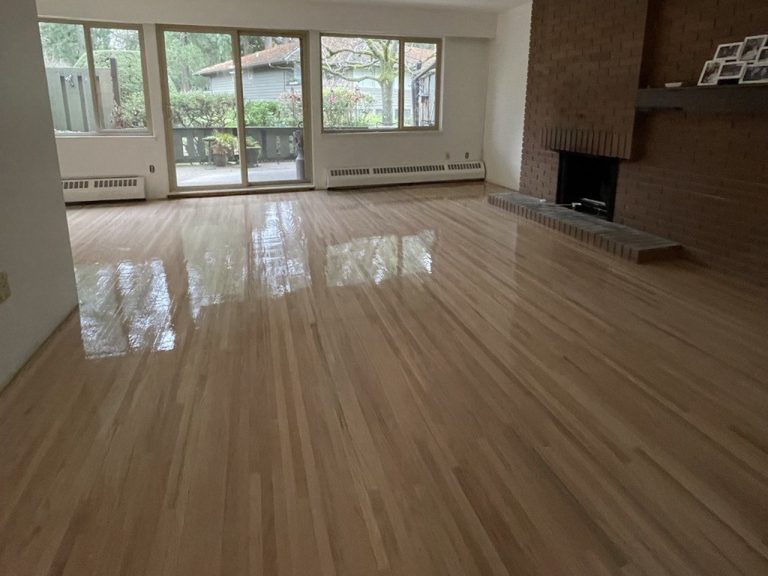
Right… when we say after refinishing, we’re talking about hardwood floors sanded down to bare wood. No old coating left. Just clean wood – and this is where the finish choice actually matters.
At this stage, most homeowners are choosing between water-based polyurethane and oil-based polyurethane. That’s the real fork in the road after sanding. Hardwax oil and specialty finishes show up too, but for specific reasons – a very natural look, spot-repair preference, unusual traffic, or tighter ventilation or timing. They’re picked intentionally, not because they’re the default.
Each finish sets a few practical rules. How the floor looks – clear and neutral versus warmer and ambered. How it’s protected – a surface film that resists scratches and spills, or a penetrating system that needs more frequent upkeep. And how long it realistically lasts. Most polyurethane finishes run about 8–15 years before a recoat. Hardwax oil systems usually need refresh coats every 2–5 years.
From what we see in real homes, the deciding factors stay pretty consistent. Durability. Dry time versus full cure – and people mix those up all the time. Odor and whether you can actually live in the house while it’s curing. Recoat potential. And how the floor behaves long-term, not just week one.
What Finish Works Best After Refinishing
Quick Recommendations for Most Homes
So… if you want the short answer, a quality water-based polyurethane system works best for most homes. It dries fast. It stays clear. Odor is manageable. And when it’s installed properly, durability is more than enough for normal residential life.
The other big plus – and this part surprises homeowners every single time – is how much easier future recoats tend to be. That’s why our crews use water-based systems on the majority of hardwood floor refinishing projects.
Oil-based polyurethane still has its place. It’s forgiving to apply and gives that classic warm tone people remember from older homes. It just comes with longer dry times and stronger smell. Hardwax oil and specialty finishes? Those are more niche. They’re solid options when the expectations line up. They’re not miracle coatings, and they definitely aren’t maintenance-free.
When a Different Finish Makes Sense
Now here’s the thing… water-based isn’t always the answer.
If someone wants a noticeably warmer tone without staining. If the house will be empty during curing. Or if we’re matching existing oil-finished floors elsewhere, oil-based can make sense. Hardwax oil fits when a homeowner wants a very natural, low-sheen look and is okay with periodic maintenance. Specialty finishes like moisture-cured or conversion varnish usually show up when performance demands it – and almost always with professional application only.
Main Hardwood Floor Finishes Used After Refinishing
Water-Based Polyurethane
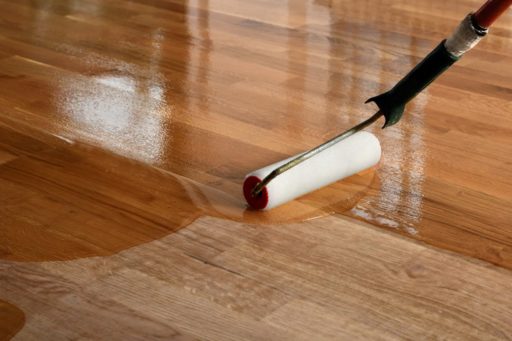
Water-based polyurethane is a surface film finish. It sits on top of the wood and creates a protective layer. What people notice right away is the look. It stays clear. On white oak, it keeps that pale, modern tone. On red oak, it doesn’t push the floor orange the way oil can – and yeah, oil always ambers over time, that’s just chemistry.
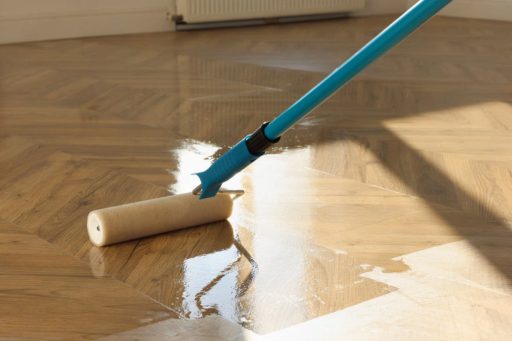
Dry time is quick. Floors are often walkable the same day, and multiple coats can go down fast. According to NWFA guidance, full cure still takes time – often measured in weeks, not hours – even though the surface feels dry much sooner.
On our refinishing projects, you can usually feel that slightly rubbery give in water-based finishes once they’ve cured – that’s normal and part of how they absorb minor impacts without cracking.
Maintenance is straightforward. And when the time comes, screening and recoating is usually possible without sanding back to bare wood.
Oil-Based (Oil-Modified) Polyurethane
Oil-based polyurethane also forms a surface film, but it behaves differently. It ambers. Always. Some homeowners love that richness. Others don’t realize how much darker the floor will look a year or two later.
Dry time is slow. Odor is stronger. I’ve had homeowners swear oil is the only durable option… then call us two days later asking when the smell goes away. That part catches people off guard.
Oil-based finishes build a thicker film, which can feel tough underfoot. They hold up well, but when they scratch, those marks tend to show more, especially at higher sheens. Recoating is possible, but timing and prep matter more. Oil systems don’t forgive skipped maintenance.
Hardwax Oil and Specialty Finish Systems
Hardwax oils and penetrating oil finishes don’t create a thick surface layer. They soak in and leave a thinner protective finish. The look is very natural. Grain pops. Sheen stays low. Scratches can often be spot-repaired, which sounds great – and sometimes is.
But maintenance is ongoing. These floors need refresh coats on a schedule. Miss those windows, and wear shows up fast.
Specialty finishes like moisture-cured polyurethane or conversion varnish are extremely durable, but they come with strong odor, strict application requirements, and limited flexibility. We only recommend them when the use case really calls for it.
Water-Based vs Oil-Based Finishes: What Actually Changes
Color and Aging
This is usually where opinions form. Water-based finishes stay clear. What you see after sanding and staining is pretty close to what you’ll see years later. Oil-based finishes deepen over time. That warm glow some people love doesn’t stop developing.
Seems obvious, right? Well… depends. Lighting, wood species, and stain choice all change how noticeable that aging becomes.
Dry Time, Odor, and Living in the Home
Dry time is not cure time. Everyone mixes those up. Water-based finishes dry fast and let you move back in sooner. Oil-based finishes take longer, and the smell lingers. You can still catch that warm oil scent days later when you walk in – especially in closed-up houses.
According to NWFA refinishing guidance and manufacturer systems like Bona and Loba, full cure takes weeks for both. Rugs, heavy furniture, and aggressive cleaning need to wait.
If you’re living in the home during curing, water-based finishes are usually the better choice. Less odor. Less downtime. Fewer headaches. EPA indoor air quality guidance also points homeowners toward low-VOC systems when possible, especially in occupied homes.
Wear, Durability, and Maintenance
Durability isn’t just about hardness. Water-based finishes resist scuffs well and age evenly. Oil-based finishes can feel tougher, but scratches often stand out more. Maintenance habits matter more than finish choice. A well-maintained water-based floor will outlast a neglected oil-based one every time.
Water-Based vs Oil-Based Finishes (Quick Comparison)
| Factor | Water-Based Polyurethane | Oil-Based Polyurethane |
|---|---|---|
| Color | Clear, minimal ambering | Warm, ambers over time |
| Dry Time | Fast | Slow |
| Odor | Low to moderate | Strong |
| Cure Time | Weeks | Weeks |
| Scratch Visibility | Lower at satin/matte | Higher at gloss |
| Recoat Ease | Easier | More prep-sensitive |
| Typical Use | Most occupied homes | Empty homes, classic look |
Sheen Levels After Refinishing
- Matte and Satin in Real Homes:
Matte and satin finishes hide scratches better. They soften reflections and make floors easier to live with. In homes with kids or pets, they’re forgiving. Matte can show burnishing in traffic lanes over time. Satin tends to age more evenly, which is why it’s the sheen we install most often. - Semi-Gloss and Gloss Considerations:
Gloss looks great… until sunlight hits it. Every scratch. Every ripple. Every reflection shows once the sun swings around.
We don’t talk people out of gloss, but we make sure expectations are clear. Maintenance needs to be tight.

Maintenance, Recoating, and Long-Term Performance
How Finish Choice Affects Recoats
This is where finish choice really pays off later.
- Modern water-based systems are recoat-friendly. Screening and recoating can extend floor life without sanding again. That saves money, wood thickness, and disruption.
- Oil-based finishes can be recoated too, but prep and timing matter more.
- Hardwax oil systems rely on regular refresh coats. Skip them, and wear accelerates fast.
What Shortens Finish Life
Grit. Furniture movement. Poor cleaners. Skipping felt pads. Letting humidity swing all over the place.
None of that is finish-specific. It’s lifestyle-specific. That’s why we always point homeowners to a clear hardwood floor maintenance guide once the job’s done.
Contractor Guidance on Choosing the Right Finish
Traffic, Pets, and Daily Use
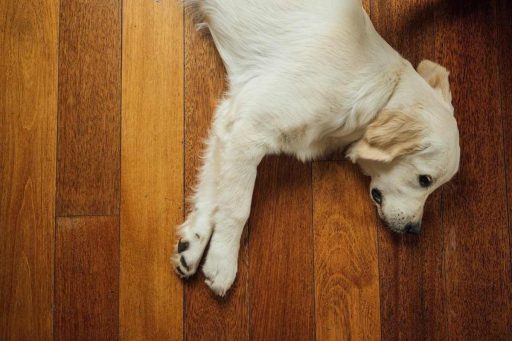
High traffic and pets don’t automatically mean “use the toughest finish available.” They mean realistic expectations. Lower sheen. Better maintenance habits. And a finish that can be recoated when needed.
In homes with engineered hardwood flooring, finish choice matters even more because sanding opportunities are limited.
Timeline and Expectations
- If you need the house back fast, water-based finishes usually win.
- If the house is empty and you want warmth, oil-based can make sense.
- If you want a natural look and are okay with upkeep, hardwax oil fits.
The right finish is the one that matches how you actually live – not just how the floor looks on day three.
Choosing a Finish That Actually Holds Up
So here’s what it comes down to. After refinishing, the finish isn’t just cosmetic. It sets the rules for aging, maintenance, and how often you’ll need to deal with the floor again. From what we see in real homes, water-based polyurethane works best for most people. Oil-based finishes still have their place. Hardwax oil and specialty systems work when expectations are aligned.
If you’re unsure, that’s normal. At 1 DAY® Refinishing, our pros walk homeowners through these decisions every day. Not based on trends. Based on how floors actually behave once the furniture’s back, the pets are running, and life kicks in.
That’s when you find out what really holds up.