Every hardwood floor has its own rhythm – you can almost hear it. Oak gives that steady creak, maple feels smooth and cool underfoot, hickory sounds firm and grounded, and cherry glows when sunlight hits just right. Our crews at 1 DAY® Refinishing catch those details every day while sanding, polishing, and bringing worn floors back to life. Homeowners often ask: “Which kind of hardwood should I choose for my home?”
Well, it starts with the type of floor itself. Solid hardwood lasts for generations and can be refinished many times. Engineered wood offers more stability in homes with changing humidity, while reclaimed and exotic woods – like old oak beams or deep-red mahogany – bring one-of-a-kind character.
Then come the species. Woods such as oak, maple, and hickory stand up to heavy traffic and multiple sanding cycles, while walnut, cherry, and pine add warmth, color, and a softer, more natural feel. Each species carries its own grain, tone, and scent once it’s sanded clean.
And finally, there’s the finish – the surface layer that changes both how a floor looks and how it feels beneath your feet. From low-sheen matte that hides dust to high-gloss coatings that reflect light across the room, the right finish ties the whole space together.
Let’s get into what makes each kind of hardwood special – and how to pick one that fits your home’s rhythm.
Main Types of Hardwood Flooring
1. Solid Hardwood Flooring – The Timeless Classic
Solid hardwood is exactly what it sounds like – a single, thick plank milled from solid wood. You can sand and refinish it again and again, which is why our crews at 1 DAY® Refinishing often restore 30- or 40-year-old oak floors that still have plenty of life left in them. It feels firm and natural underfoot, with that unmistakable warmth only real wood gives. Solid hardwood performs best when installed on or above ground level, in areas where humidity stays moderate and stable throughout the year.
Refinishing potential: typically 5 to 10 full sanding cycles over its lifetime, depending on board thickness.
Key traits: nailed directly to the subfloor, incredibly long-lived when humidity is controlled, and ideal for homeowners who want floors that can be renewed for decades rather than replaced.
2. Engineered Hardwood Flooring – Stable, Smart, and Versatile
Engineered hardwood combines a real hardwood veneer with a layered plywood or HDF core. That structure keeps it from expanding or contracting as much as solid wood, which helps in homes that see seasonal humidity swings. It still refinishes beautifully – our pros just sand lightly to protect the thinner wear layer. You’ll find it in basements, kitchens, and open living spaces, where moisture control matters more than depth of wood.
Refinishing potential: usually 1 to 3 professional sanding cycles, depending on veneer thickness (most quality boards average 3–5 mm of wear layer).
Key traits: dimensionally stable, compatible with radiant-heat systems, and a practical choice when solid planks aren’t ideal.
3. Reclaimed and Exotic Hardwood Floors – Personality in Every Board
Some hardwoods already carry a lifetime of stories. Reclaimed boards from barns, mills, or old homes show knots, nail marks, and deep patina that no factory finish can copy. When sanded, they release that warm, earthy scent of aged timber – something our crews always notice on restoration jobs. Exotic woods such as Brazilian cherry, tigerwood, and mahogany bring dense grain, rich color, and exceptional hardness (often 1,800–2,800 on the Janka scale). They can challenge sanding belts but reward patience with mirror-smooth results.
Refinishing potential: typically 2 to 5 cycles for reclaimed boards (depending on previous wear) and 3 to 6 for most exotics.
Key traits: high visual impact, excellent longevity, and – when sourced as FSC-certified reclaimed wood – a sustainable way to add character and history to modern homes.
Popular Hardwood Species and Their Feel
When people start comparing species, they want to know how hard each one is and how it looks after refinishing. That’s where the Janka Hardness Scale comes in – it measures dent resistance. Higher numbers mean tougher wood, but softer species often refinish more gracefully and gain character with time.
| Species | Hardness (Janka) | Color & Grain | Best Use |
|---|---|---|---|
| Red Oak | 1,290 | Warm red-brown, open grain | Living rooms, halls |
| White Oak | 1,360 | Golden tone, fine grain | Dining rooms, kitchens |
| Maple | 1,450 | Pale, smooth surface | Bedrooms, lofts |
| Hickory | 1,820 | Rugged, contrasting grain | High-traffic zones |
| Walnut | 1,010 | Deep brown, rich tone | Offices, formal rooms |
| Cherry | 995 | Reddish, darkens over time | Living areas |
| Birch | 1,260 | Light, subtle pattern | Bedrooms |
| Ash | 1,320 | Bright, lively grain | Family rooms |
| Pine | 690 | Soft, rustic character | Low-traffic spaces |
| Mahogany | ≈ 850 | Reddish-brown depth | Library, study |
Below’s how these woods behave once they’ve been lived on – and later refinished.
Oak (Red & White)
Reliable, classic, forgiving – oak’s the kind of wood that never really goes out of style. White oak takes stain evenly, while red oak brings that soft, amber warmth that makes a room feel lived in. When it’s freshly sanded, there’s this faint vanilla-wood scent that tells us the floor’s breathing right again. Its open grain hides the little dents and sanding marks that come with real life, and with proper care, it can be refinished close to ten times before it ever needs replacing. No wonder homeowners keep choosing it, generation after generation.
Maple – Bright, Smooth, and Clean
Maple catches light beautifully, but its tight grain makes stain a bit tricky. We lean on water-based finishes to hold that pale, clean glow. Great for bedrooms or modern, open layouts. Hartco’s data shows maple’s fine texture shrugs off deep scratches yet can highlight scuffs under high gloss. The trick is steady, shallow passes with the sander – too much heat, and it can burn.
Walnut – Soft Shadows and Quiet Luxury
Dark, silky, and soft underfoot – the kind of floor that hushes a room. After refinishing, that espresso-brown tone comes back like polished leather. A bit softer than oak, walnut compresses instead of chipping. That give makes it feel warm and relaxed, perfect for living rooms, studies, or anywhere you want calm energy underfoot.
Hickory – The Workhorse Wood
Tough, lively-grained, and proud of it. You can feel hickory’s strength the second your foot hits the board – dense, grounded, built to last. A satin finish keeps the contrast alive while softening the scuffs that daily traffic brings. Its hardness sits high on the Janka scale, around 1,820, which means it laughs off dents that would mark softer woods. It does shift a bit with humidity, so pairing it with moisture-resistant wood floor sealants keeps those seasonal changes under control. That combo – strong grain, sealed surface, and a little patience – gives you a floor that holds up to kids, pets, and a good couple of decades of real living.

Cherry – The Shifting Beauty
Cherry starts pale and deepens to amber as sunlight works its slow magic. It’s soft but sands like butter and looks incredible after a light refinish. When buffed, it gives off a faint sweet scent – almost fruity. Because it darkens quickly, UV-protective finishes or shaded windows help keep color consistent. Most homeowners love how it matures naturally – that’s part of its charm.
Birch – Easygoing and Approachable
Clean lines, soft contrast, friendly to the budget. Birch accepts stain evenly, making it perfect for remodels or first refinishing jobs. Its medium hardness and tight grain mean predictable sanding – less risk, steady results. Feels a little warmer than maple once coated, a good match for bedrooms or quiet nooks.
Ash – Springy and Energetic
Ash has that subtle bounce homeowners always notice. Its bright grain seems to lift a whole room. As noted in the U.S. Forest Service Wood Handbook (Forest Products Laboratory, 2010), ash’s mix of elasticity and medium density gives it that springy, forgiving feel underfoot – the kind that makes kitchens or work areas easier to stand in for hours. It sands smooth, takes stain without much fuss, and always finds its way back to a clean, lively look after refinishing.
Pine – Soft, Rustic, and Honest
Pine dents, sure – but that’s part of its story. Once sanded, the air smells like fresh resin and sawdust. A water-based polyurethane keeps its honey color natural. It’s softer than true hardwoods, yet forgiving to work with. Perfect for older homes or cottages where a few dings just make it feel lived in.
Mahogany – Deep, Steady Warmth
Elegant, steady, and timeless. When polished, it shimmers between copper and wine. Common in heritage homes and always rewarding to refinish. Mahogany’s closed grain handles moisture better than most dark woods, and Hartco’s durability charts list it among species that keep their finish sheen the longest. Each sanding brings back that rich glow without losing depth.
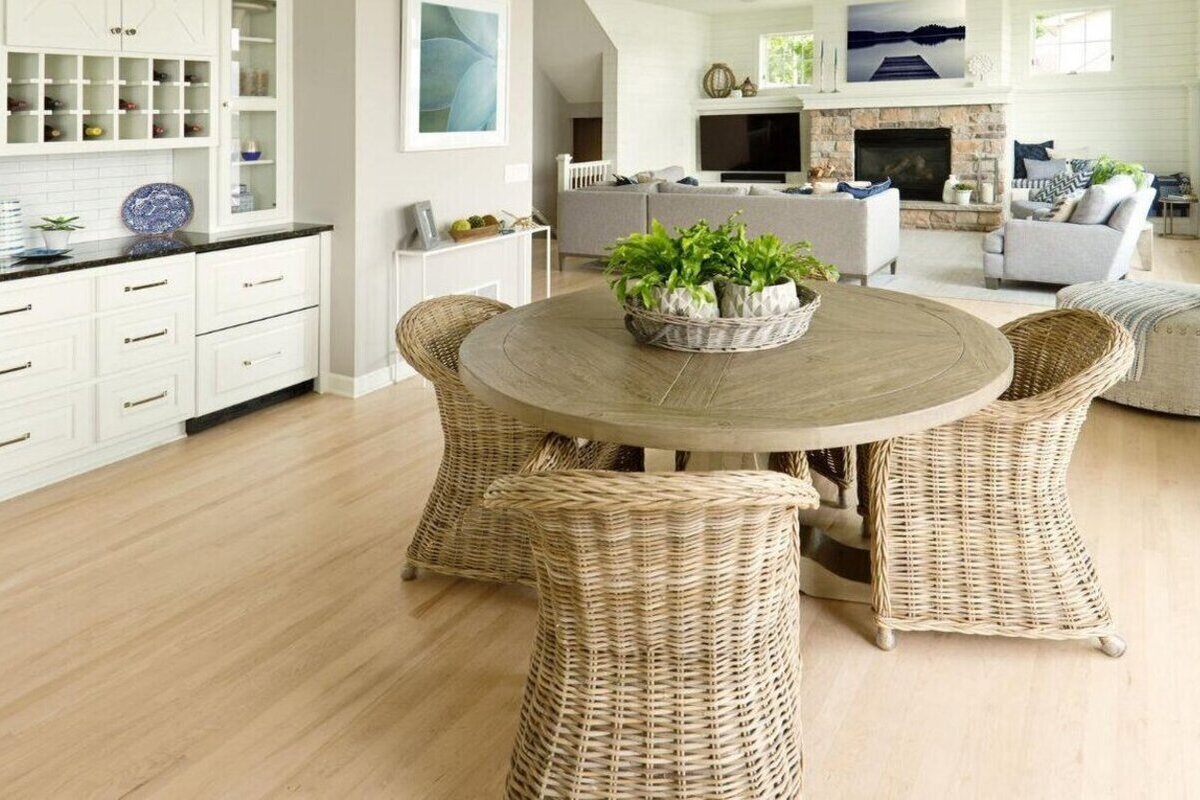
Matching Hardwood Floors to Room Types
Before picking a species, think about how each room lives. Kitchens breathe heat and moisture; hallways take hits from shoes and grit; bedrooms need quiet comfort underfoot. Over the years, our crews at 1 DAY® Refinishing have seen the same pattern – certain woods just work better in certain spaces. The table below blends real homeowner feedback with what we’ve learned sanding and restoring floors day in, day out.
| Room Type | Recommended Hardwood | Notes from the Field |
|---|---|---|
| Living / Dining | Solid Oak, Walnut, Cherry | Timeless look, easy to refinish multiple times, handles light wear beautifully. |
| Bedroom | Maple, Birch, Pine | Warm, soft underfoot; quieter feel when walking barefoot; gentle sanding keeps them glowing. |
| Kitchen – Moisture and Heat Challenges | Engineered Oak or Hickory | Stable in changing humidity; holds finish well if sealed edges and water-resistant topcoats are used. |
| Bathroom / Powder Room – Use with Care | Engineered hardwood with sealed joints | Needs strong ventilation, sealed perimeters, and regular checks for moisture buildup – always follow humidity guidelines for wood flooring to keep edges tight and finishes stable. |
| Basement – Below Grade | Engineered Oak or Hickory | Designed for glue-down setups; resists seasonal expansion and refinishes cleanly if the veneer’s thick enough. |
| Hallway / Entry – High Traffic Zones | Hickory, White Oak | Hard, durable surfaces built for shoes, pets, and constant motion; refinish every 10–15 years for best wear. |
Most research we’ve seen – including findings from the National Wood Flooring Association (NWFA) on moisture and wood performance – confirms what we find in the field: stable humidity and proper finish selection extend a floor’s life more than any coating alone. The science just backs up what experience already shows.
When you’re comparing, picture how the floor feels and sounds. Oak carries a confident step; walnut gives a soft thud; pine hushes a room. Those tiny details – the warmth, the echo, the way light hits the grain – often decide what feels right for your home more than any spec sheet ever could.

Choosing the Right Hardwood – Expert Advice
Here’s what our team usually tells homeowners before they decide which hardwood fits their home and lifestyle:
-
Think Refinishing Before Replacing.
A solid oak or maple floor can handle five, six–sometimes even ten–complete sandings in its lifetime. Engineered floors allow one or two careful refinishes, depending on veneer thickness. Keeping what you have and renewing it when needed usually brings better long-term value than starting from scratch. -
Don’t Overlook Softer Woods.
Cherry and pine may dent, but refinishing blends those marks into the grain and gives them depth. Some of the most beautiful floors we’ve restored were full of character – small scratches, subtle color shifts, the kind of wear that feels lived-in, not worn-out. -
Match the Finish to How You Live.
Matte hides dust, satin brings a soft glow, and gloss bounces light across a room. During refinishing, we often test a few finish options so homeowners can see how sheen affects both look and feel before committing. For homes with kids, pets, or busy hallways, it’s worth learning more about finishes for high-traffic hardwood floors that hold up under everyday wear. -
Keep an Eye on Humidity.
Wood breathes – it expands and contracts with the seasons. A simple home hygrometer helps. Stay within 35–55% RH, and your floors will stay flat, smooth, and ready for the next refinish when the time comes. -
Plan for Upkeep, Not Perfection.
Hardwood floors age gracefully if you let them. A light buff and coat every few years preserves the surface, while full sanding resets it completely. Perfection doesn’t last long – but well-finished wood only gets better after every refinishing cycle.
Finish Options and Sheen Levels
A finish doesn’t just seal wood – it decides how that floor lives day to day. The right sheen changes how light moves across the room, how your shoes sound on the boards, even how warm the surface feels under bare feet. After years of restoring every kind of floor imaginable, our crews at 1 DAY® Refinishing know exactly how each finish behaves once it’s lived in:
| Finish Type | Sheen Level | Best Rooms | Notes from the Field |
|---|---|---|---|
| Oil-Based Polyurethane | Semi-Gloss / Gloss | Dining & formal areas | Warm tone, slower cure, deepens color beautifully. |
| Water-Based Polyurethane | Matte / Satin | Bedrooms, kitchens | Low-VOC, fast-dry, stays clear without yellowing. |
| UV-Cured Factory Finish | Satin / Semi-Gloss | Prefinished floors | Hard, odor-free surface ready to walk on. |
| Hard-Wax Oil | Matte | Living rooms & hallways | Natural texture, easy spot repair, soft underfoot. |
| Aluminum Oxide Coating | Low Satin | High-traffic zones | Toughest surface; harder to sand later. |
Each finish changes more than shine. Oil-based feels rich and warm; water-based keeps the room cooler and lighter. Go semi-gloss if you like a floor that “talks” a little when you walk, or matte if you want quiet comfort. And remember – finish choice also shapes how long you’ll wait before that next refinish.

Maintenance Tips by Wood Type
Good floors age well when they’re cared for, not pampered. Maintenance is simple, but rhythm matters: light weekly cleaning, seasonal checks, and a full refresh before the finish wears thin. Here’s what usually works best:
- Oak / Hickory – Vacuum once a week, damp-mop monthly with a neutral-pH cleaner, and recoat every 5–7 years. Heavy-use homes might need a quick buff-and-coat between full refinishes closer to every 3 years.
- Maple / Birch – Skip harsh or ammonia cleaners – they cloud the finish. Wipe spills fast, keep felt pads under furniture, and plan for a recoat every 5 years or so.
- Walnut / Cherry – Dry-mop two or three times a week; darker tones show every footprint. A light topcoat every 6–8 years keeps color deep and surface smooth.
- Pine – Softer, sure, but forgiving. Clean with a barely damp mop, and schedule a light sanding and recoat every 8–10 years to even out wear.
- Engineered Hardwood – Stick to dry-mopping; moisture sneaks into seams fast. Keep humidity steady between 35 and 55 percent year-round to prevent cupping.
Use cleaners made for polyurethane or hard-wax finishes – nothing oily, soapy, or acidic. Avoid soaking the floor; a little moisture goes a long way. The goal isn’t mirror shine, it’s balance – keeping that finish flexible so refinishing stays years away.
When scratches start stacking up or the surface dulls, that’s when 1 DAY® Refinishing steps in. Our crews handle sanding, staining, and sealing – usually in about a day – so the floor you already love comes back brighter, smoother, stronger.
Floors That Feel Like Home
Hardwood breathes with a house – warming in sunlight, cooling after dark, holding memories in every mark. Picking the right type isn’t about trends or gloss; it’s about the rhythm of your rooms and how the wood lives with you. From solid oak to modern engineered boards, we’ve seen every kind of floor come alive again after a careful refinish.
When your floors start looking tired, just reach out to 1 DAY® Refinishing for a free quote. We’ll bring back the color, smoothness, and warmth you fell in love with – dust-controlled sanding, durable finishes, and a crew that treats every board like it’s their own.
And honestly, if you’re standing there debating oak versus maple, you’re already close. The best hardwood isn’t the hardest or the glossiest – it’s the one that feels right under your feet every single day.