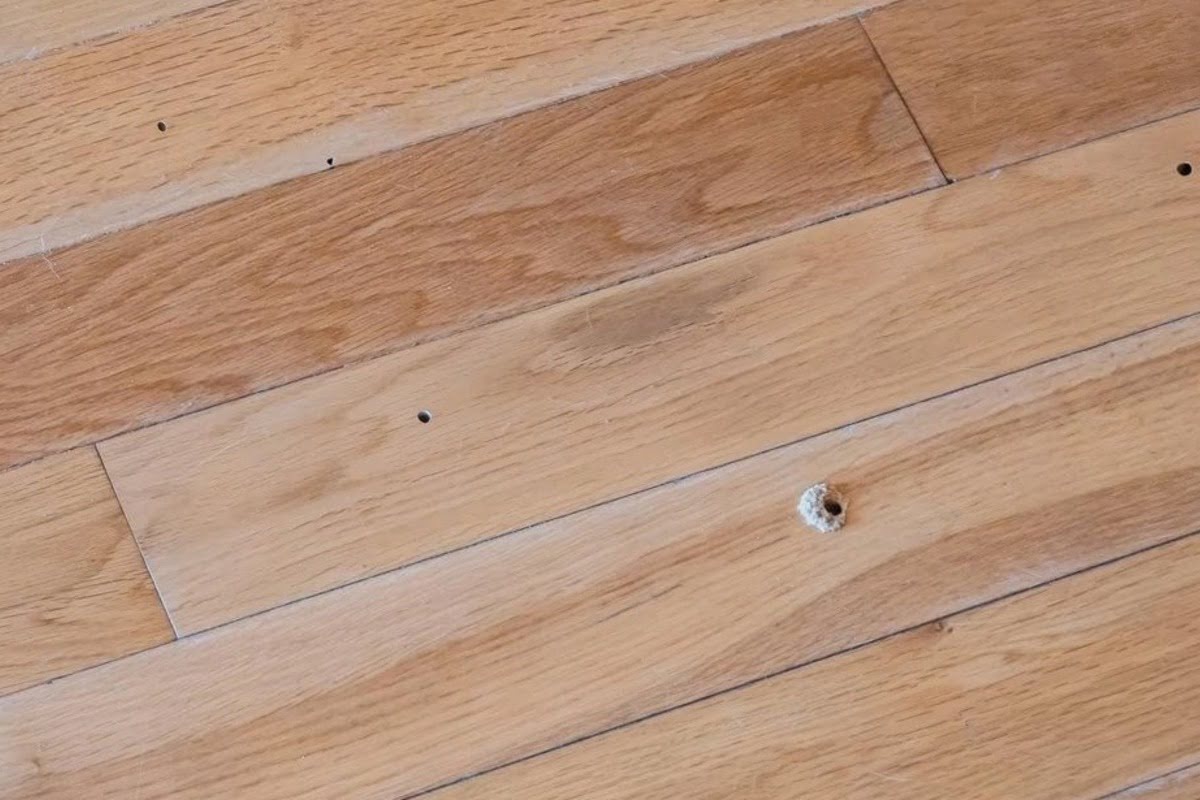
Hardwood floors add a timeless elegance and warmth to any home, but they aren’t immune to damage. Over time, you may notice holes forming in your beautiful hardwood surfaces. Whether these blemishes are small or large, they can be an eyesore and detract from the overall aesthetic of your living space. Fortunately, you can address these issues effectively with a bit of know-how and the right materials.
Why Do Holes Form in Hardwood Floors?
Holes in hardwood floors can arise from various causes, each requiring a different approach for repair. Understanding the underlying reasons can help you prevent future occurrences and address existing problems effectively. One common cause is the natural expansion and contraction of wood due to changes in temperature and humidity. Over time, this can lead to gaps and holes, especially if the flooring was not installed with adequate allowances for movement.
Another frequent culprit is physical damage. Heavy furniture, high heels, or accidental drops of sharp objects can dent or puncture the wood surface. Pets can also contribute to this problem, as their claws and playful behavior might scratch or gouge the floor. Regular maintenance, such as trimming pet nails and using protective pads under furniture, can mitigate this risk.
Lastly, improper installation or aging can lead to issues such as loose boards, which are more prone to developing holes. Ensuring professional installation and routine checks can help maintain your floors in top condition. Understanding these causes will enable you to take proactive measures and select the appropriate repair techniques when necessary.
How to Fix Small Holes in Hardwood Floors
Small holes, such as those from nails or minor blemishes, can often be repaired with minimal effort. Here’s how you can tackle these imperfections:
- Clean the Area: Before starting, clean the affected area using a soft brush or a vacuum cleaner to remove any debris or dust. This ensures that the filler adheres properly.
- Select the Right Filler: Choose a wood filler that matches your floor color. Many brands offer a range of colors, so you can find one that blends seamlessly with your flooring.
- Apply the Filler: Using a putty knife, apply the filler into the hole. Ensure it’s packed tightly and slightly overfill it to allow for sanding later.
Smooth the Surface: Once dry, sand the area gently with fine-grit sandpaper until it is smooth and even with the surrounding floor. - Finish and Seal: Apply a matching stain and sealant to the repaired area to protect it and ensure it matches the rest of the floor.
Follow these steps to effectively repair small holes and preserve the integrity and appearance of your hardwood floors.
How to Repair Large Holes Without Replacing Boards
Large holes can be daunting, but they don’t always require replacing the entire board. Here’s how to handle them:
- Assess the Damage: Determine the extent of the hole. If the surrounding wood is stable and not rotten, repair is possible.
- Use a Wood Patch: For larger holes, a wood patch or an epoxy filler may be required. These materials are strong and can be molded to fit the damaged area.
- Prepare the Hole: Clean out any debris and sand the edges of the hole. This ensures a good bond between the patch and the existing wood.
- Apply the Patch: Follow the manufacturer’s instructions to mix and apply the wood patch. Use a putty knife to ensure it fills the hole entirely.
- Sand and Finish: Once the patch is dry, sand it down to be flush with the surrounding area. Apply matching stain and finish to integrate the repair with the rest of the floor.
Use these techniques to effectively repair large holes without resorting to costly and time-consuming board replacements.

Best Wood Fillers for Hardwood Floor Repairs
Choosing the right wood filler is critical for a seamless repair. Here are some top wood fillers that work well for hardwood floors:
| Wood Filler | Features |
| Elmer’s Carpenter’s Wood Filler | Dries fast, easy to sand, and paintable. |
| Minwax Stainable Wood Filler | Accepts stain well, ideal for larger holes. |
| DAP Plastic Wood Filler | Durable, for interior and exterior use. |
| Timbermate Wood Filler | Non-toxic, water-based, and easy to use. |
When selecting a filler, consider the size of the hole, the type of wood, and whether you will need to stain the repair. Quality fillers enhance the longevity and appearance of your hardwood floors.
Patching Nail Holes, Knot Holes, and Gouges
Different types of damage require specific methods for repair. Nail holes, for instance, are generally small and can be filled with a basic wood filler or wax stick. Simply clean the hole, apply the filler with a putty knife, and smooth it out. Once dry, sand lightly and apply a matching stain if necessary.
Knot holes, often larger and deeper than nail holes, may require a more substantial filler, such as epoxy. Begin by cleaning the area thoroughly, then fill the hole with the chosen filler. Use a putty knife to smooth it over, and once dry, sand the area to ensure a level surface before staining and finishing.
Gouges, or deep scratches, may require a combination of techniques. Start by cleaning and lightly sanding the damaged area to remove any rough edges. Apply a wood filler appropriate for the size of the damage, and once it cures, sand and refinish the area to match the surrounding floor.
How to Match Stain and Finish After Repair
Matching the stain and finish is essential for a seamless look. Here’s a step-by-step guide:
- Test the Stain: Always test the stain on a scrap piece of wood or an inconspicuous area to ensure it matches the existing floor.
- Apply the Stain: Use a brush or cloth to apply the stain to the repaired area. Wipe off excess and let it dry completely.
- Seal the Repair: Once the stain is dry, apply a sealant. Whether it’s polyurethane or a wax finish, ensure it’s the same type used on the rest of the floor.
- Buff and Polish: Finally, buff the area to blend the repair with the surrounding floor for a uniform finish.
This meticulous process ensures that your repair is not only functional but also visually harmonious with the rest of your flooring.
Can You Fix Holes in Engineered Wood Floors?
Repairing holes in engineered wood floors follows a similar process to solid hardwood, with a few key differences. Engineered wood consists of a thin layer of hardwood on top of a plywood base, making it essential to avoid sanding too deeply, which could damage the veneer.
For small holes, use a wood filler compatible with engineered wood, applying it carefully to avoid excess on the surrounding area. For larger holes, an epoxy filler may be required, applied with the same care to prevent damage to the veneer layer.
After filling, be gentle with sanding, using a fine-grit paper to avoid penetrating the hardwood layer. Finish the repair with a matching stain and finish, taking care to blend it seamlessly with the existing floor.

Preventing Holes from Pets, Furniture, and Moisture
Preventing damage to your hardwood floors is key to maintaining their beauty and longevity. Here are some tips to help you avoid holes from common culprits like pets, furniture, and moisture:
- Pets: Keep your pet’s nails trimmed and consider using rugs or runners in high-traffic areas. Training your pets to avoid scratching the floor can also minimize damage.
- Furniture: Use felt pads or coasters under furniture legs to prevent scratches and dents. When moving furniture, lift it instead of dragging it across the floor.
- Moisture: Maintain consistent humidity levels in your home to prevent wood expansion and contraction. Use a dehumidifier in damp areas and clean up spills promptly to avoid water damage.
Take these preventive measures to keep your hardwood floors in excellent condition and reduce the need for repairs.
Conclusion
Repairing holes in hardwood floors, whether small or large, is a manageable task with the right tools and techniques. By understanding the types of damage, using quality fillers, and following a detailed repair and finishing process, you can restore your floors to their original splendor. Remember, regular maintenance and preventative measures are crucial in preserving the beauty and durability of your hardwood floors. If you’re not confident in DIY repairs, or the damage is extensive, consider consulting a professional. Your hardwood flooring is an investment in your home, and maintaining its condition is paramount.